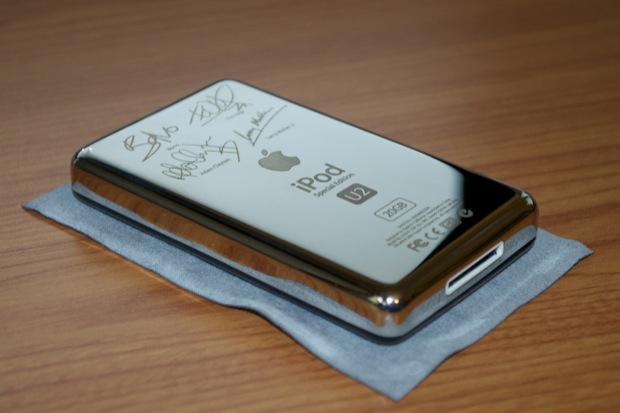
I scored my
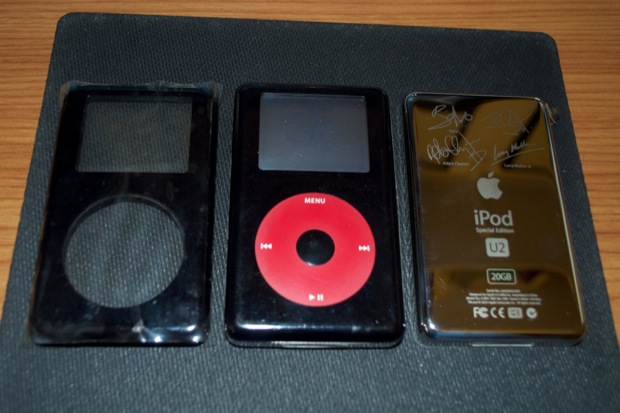
2004 U2 Special Edition iPod in the box for only $65 bucks. That was a pretty good deal considering it was in working order and it included the box, all the original accessories, and paperwork. Mint condition U2 iPods regularly list on eBay in the $300 range. Despite being 8 years old, this little iPod was in pretty good shape. A lot of second hand iPods of the 2004 vintage and totally scratched up. I probably would have been OK with it the way it was. Unfortunately, the previous owner must have cracked it open at some point to do a battery swap. They did a pretty lousy job of popping it open and apparently didn’t use a plastic spludger.
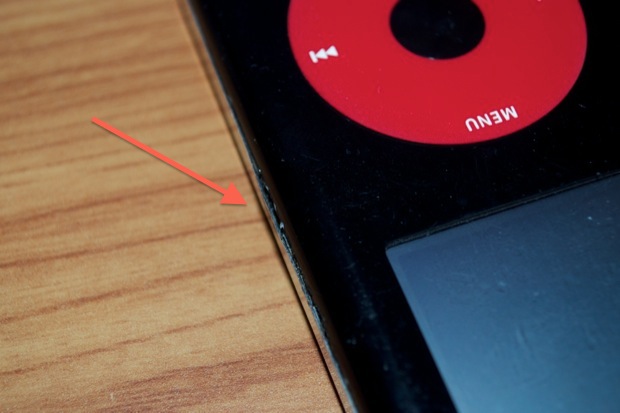
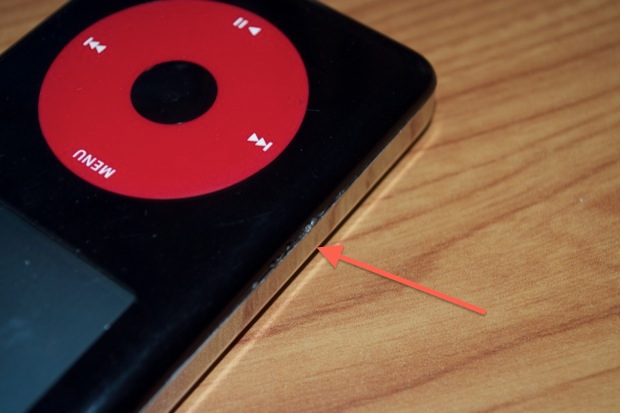
Both sides are pretty gouged up. No doubt the aftermath of a metal flathead screwdriver or pocket knife.
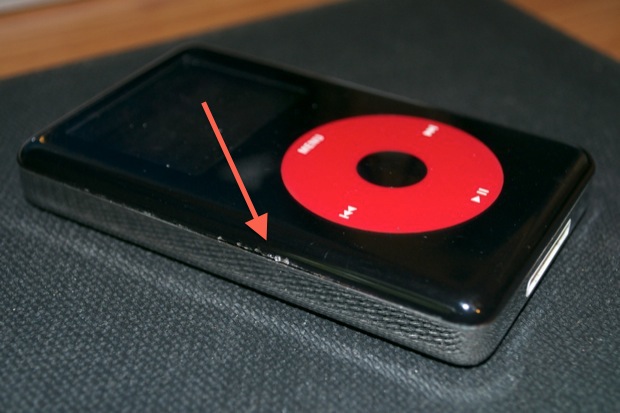
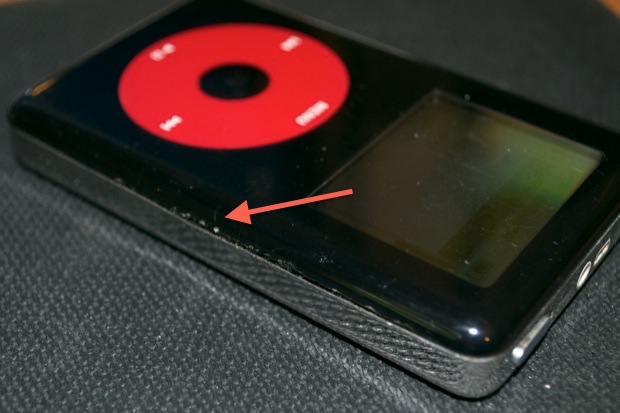
As if the gouging wasn’t bad enough, they bent the frame prying it open. You can clearly see a little gap on both sides right at the seam.
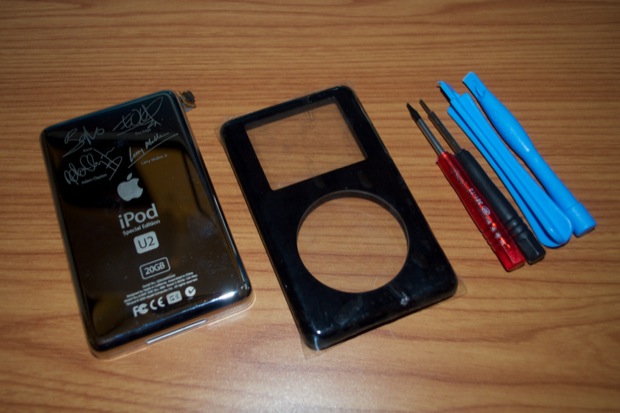
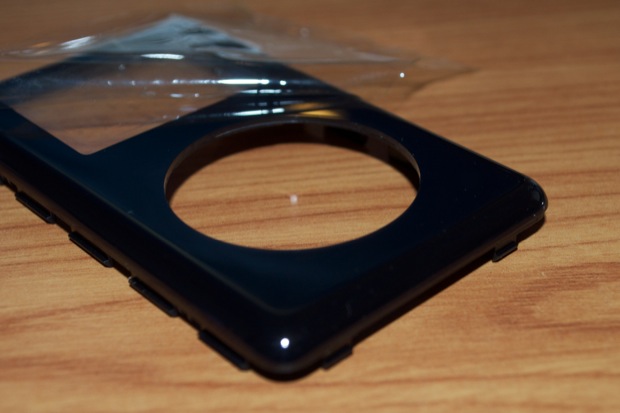
It took me a month, but I finally managed to find a brand new replacement for the front and back panels. The front panel even came with some spludgers and screwdrivers.
Wow, look at that! Pulling the protective plastic coating back just a little reveals the newest looking iPod you’ve even seen!
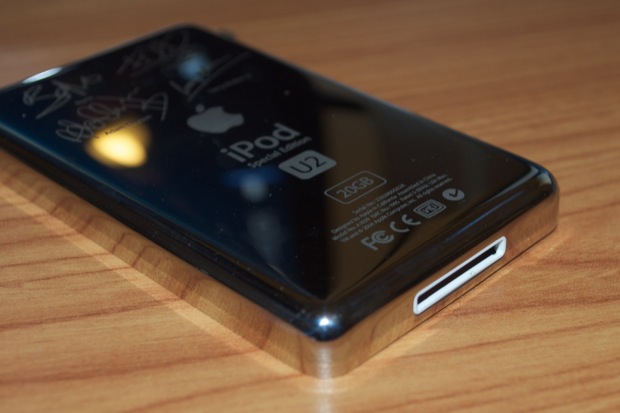
The back looks great too. Not so much as a single scratch. This iPod is going to look factory new!
Let’s get to it.
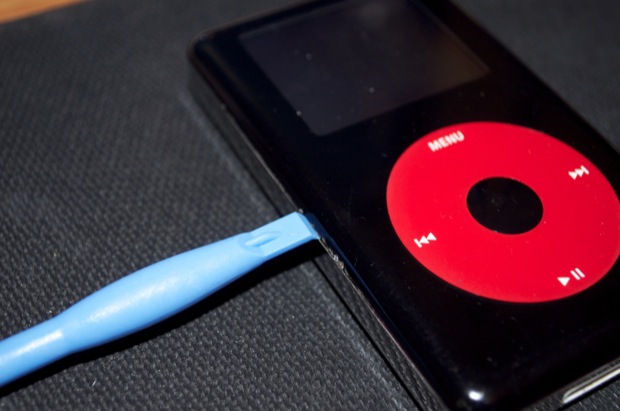
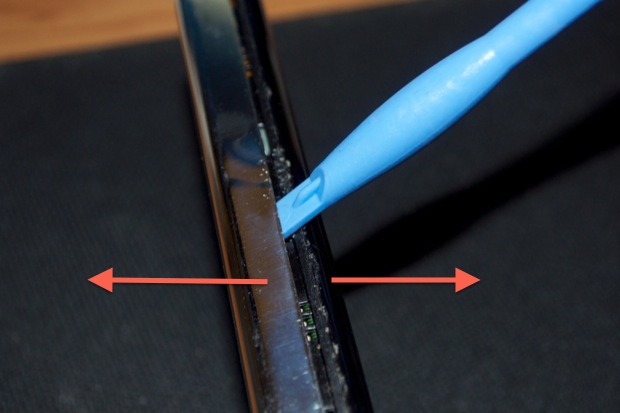
Using the plastic spludger, dig in and separate both halves.
Even though this iPod has already been cracked open, it still took a little bit of force to pry it in half. I was really hoping that the previous owner didn’t Krazy glue it back together. Sometimes when you open an iPod, you break off the little plastic clips that hold it together. When you try and reassemble it, you’ll find that it’s never quite the same after that. The front and back panels never really click together like they used to. After a while, you’ll notice that the two halves start to creep apart. Sometimes you have to glue the two halves together, making future repairs impossible.
Since I was having a little bit of trouble, I thought that this iPod might have been glued together. That’s bad. Do you know how hard it’ll be to crack it open without destroying the display or logicboard?
I crossed my fingers and kept at it. Soon enough, the two halves separated. It wasn’t glued after all, it was just a really tight fit.
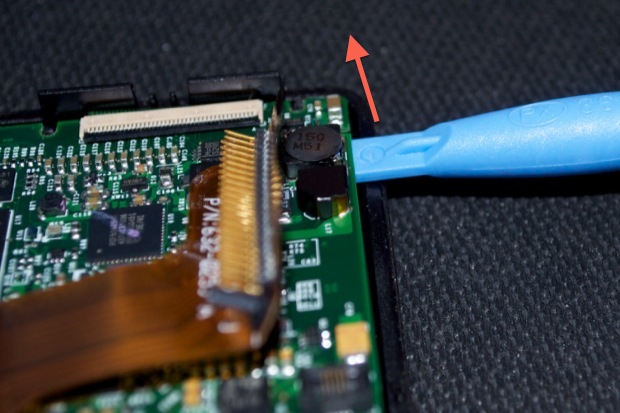
At this point, you’d be tempted to just pull the two halves apart, but take it easy.
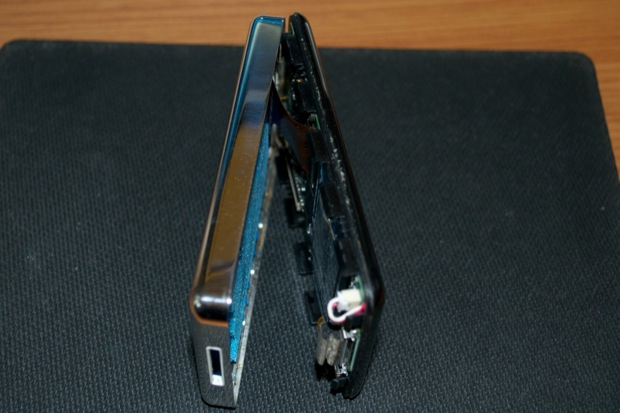
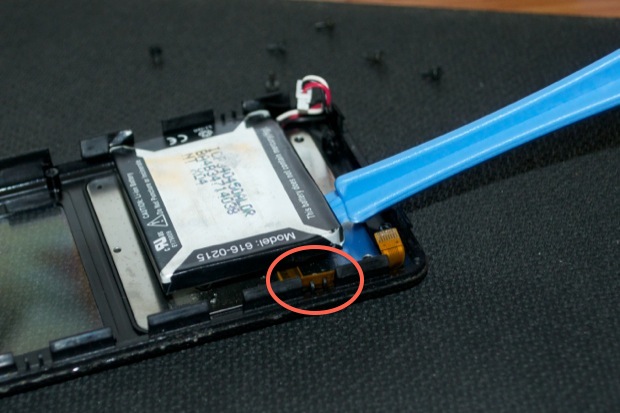
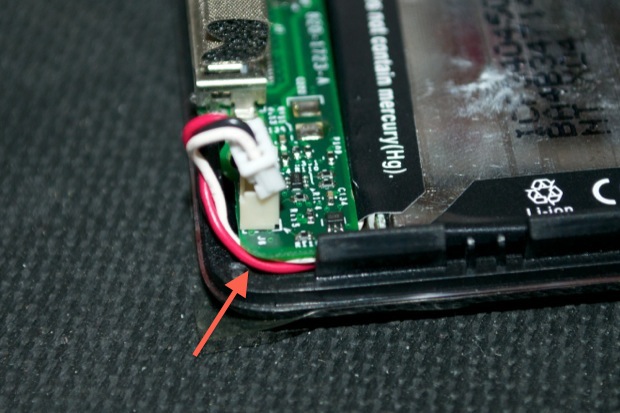
You’ll want to disconnect the battery before you do anything.

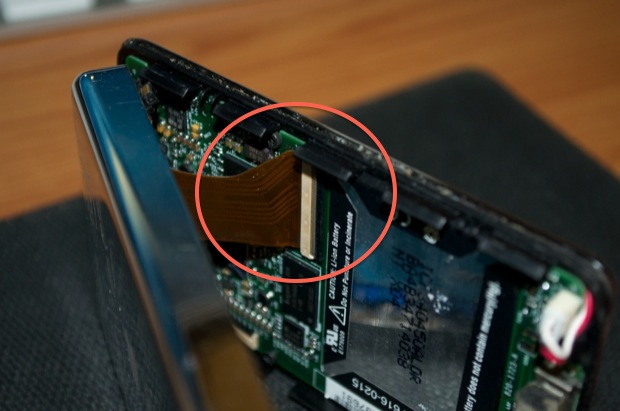
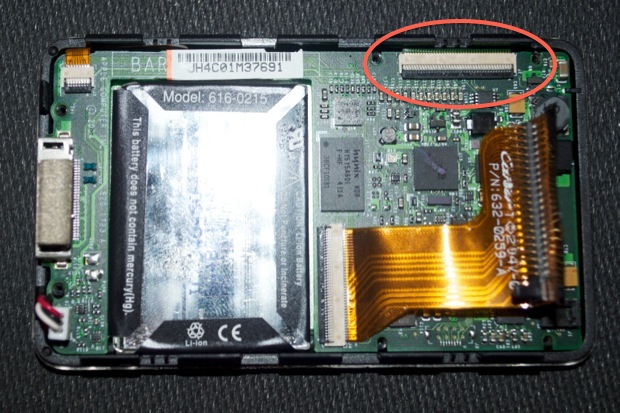
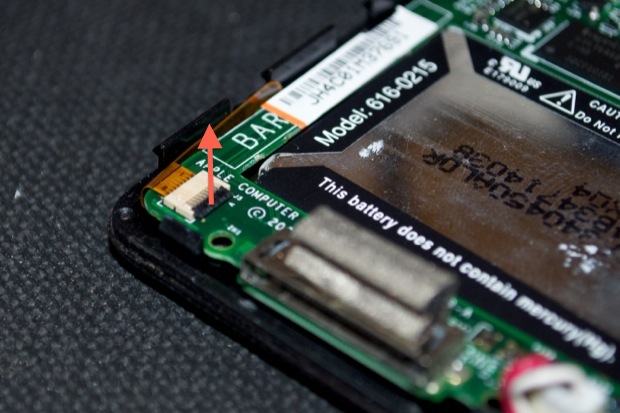
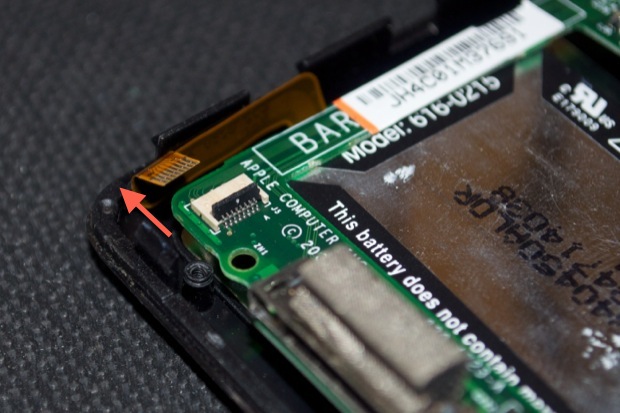
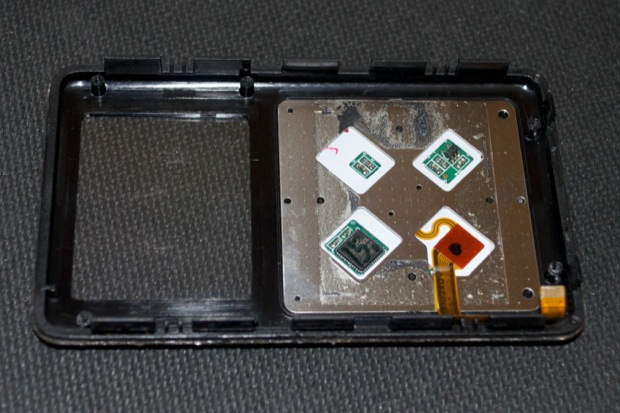
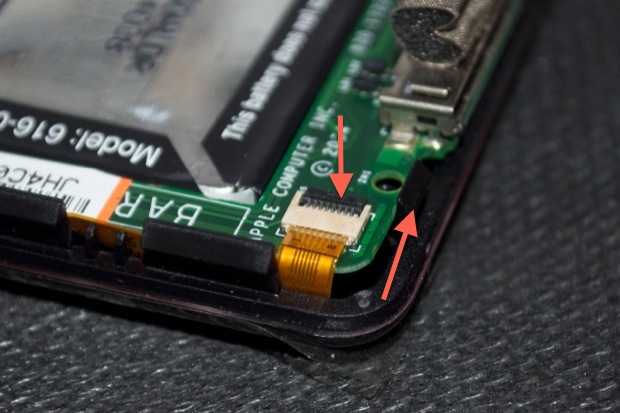
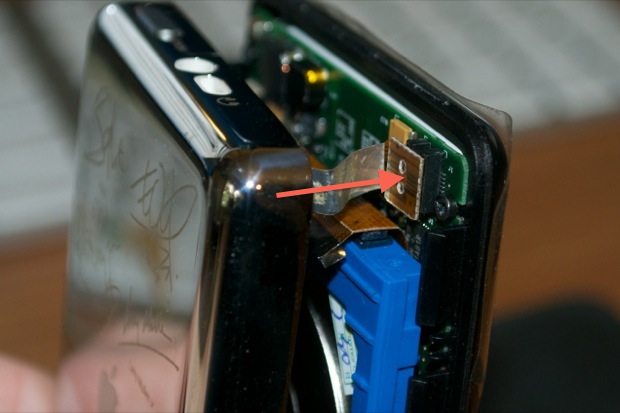
Both halves are also still connected at the top by a small ribbon cable that leads to the headphone jack / hold switch board.
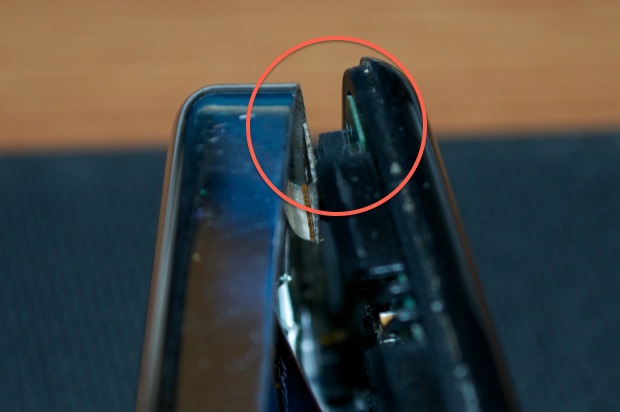
Pop the connector off, but wait…
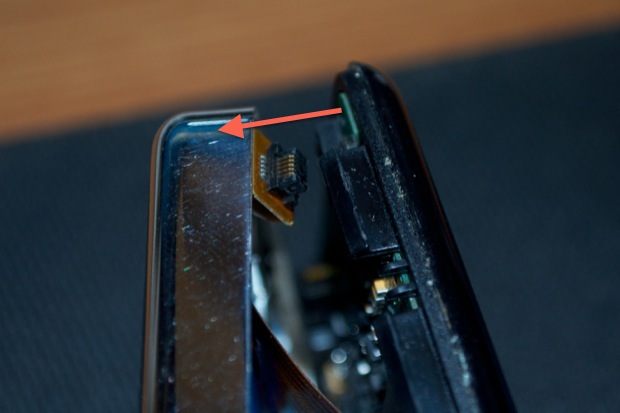
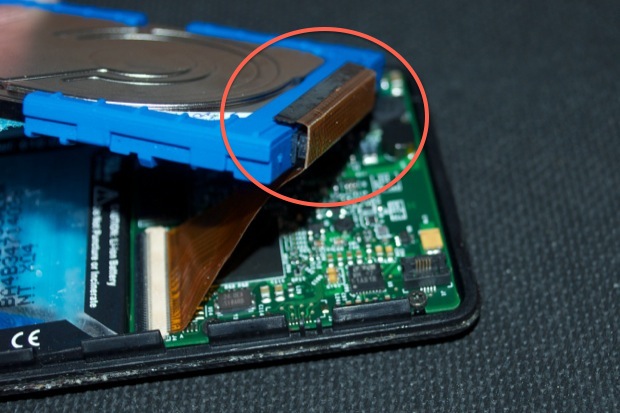
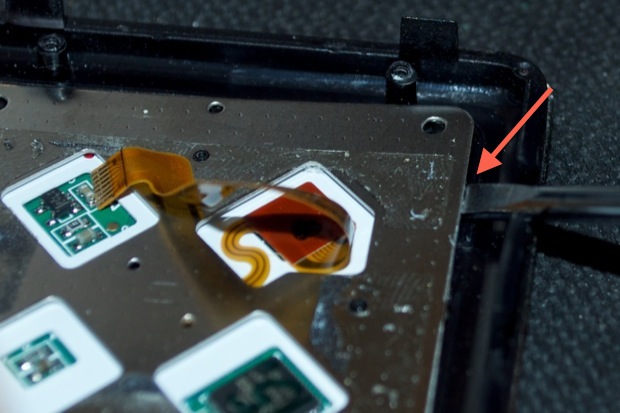
The hard drive is probably stuck to the back half by some adhesive. It’s also still connected to the logic board.
Gently pry the hard drive away from the back.
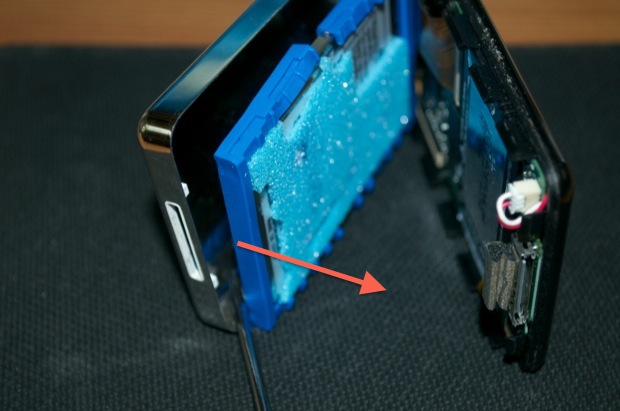
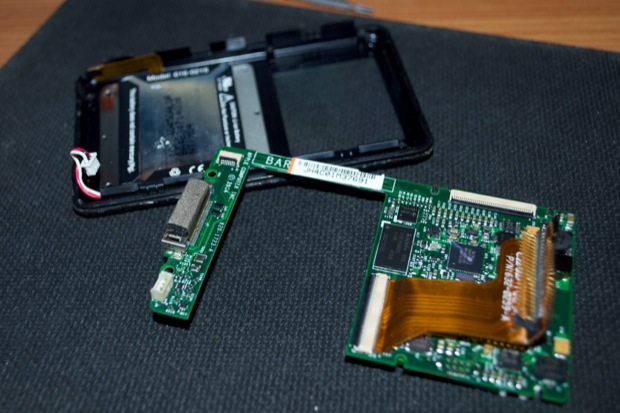
Now you can separate the two halves.
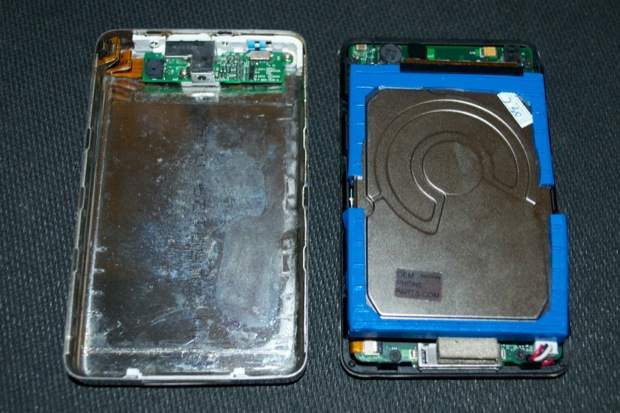
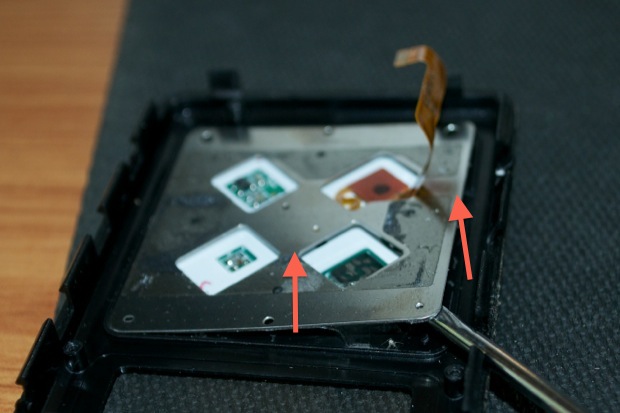
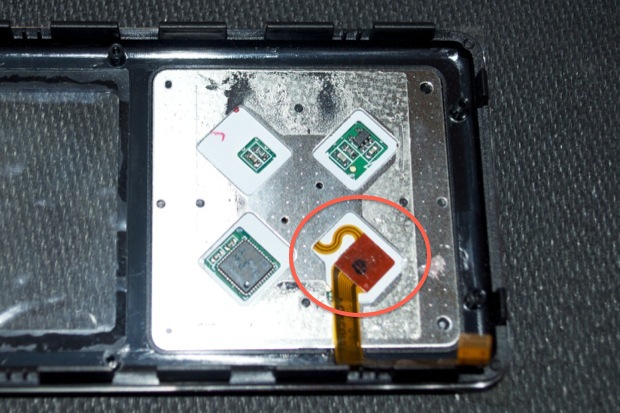
Some replacement backs don’t come with the headphone / hold switch board. You have to transplant the old to the new. Luckily, my replacement came with the hardware installed.
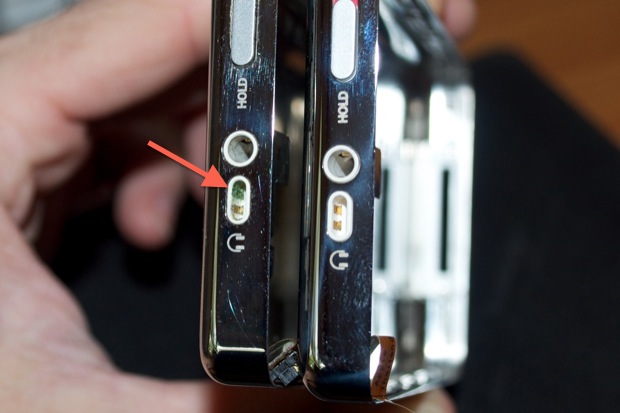
Thankfully too, the accessory port on the top of my old one had some corroded pins.
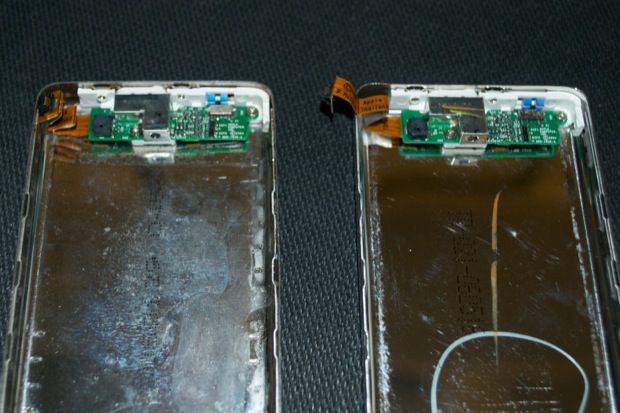
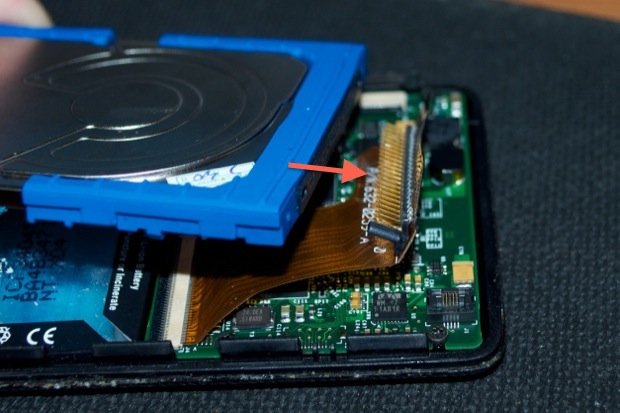
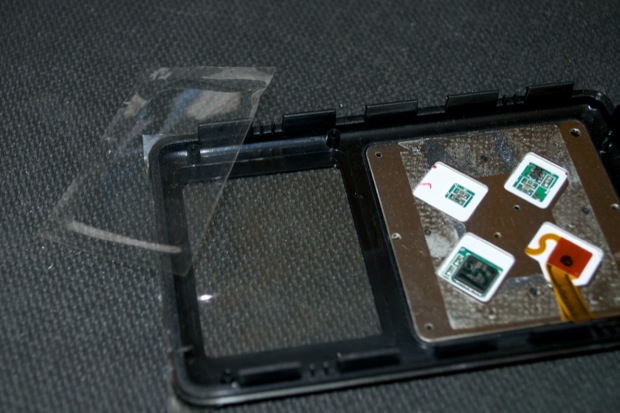
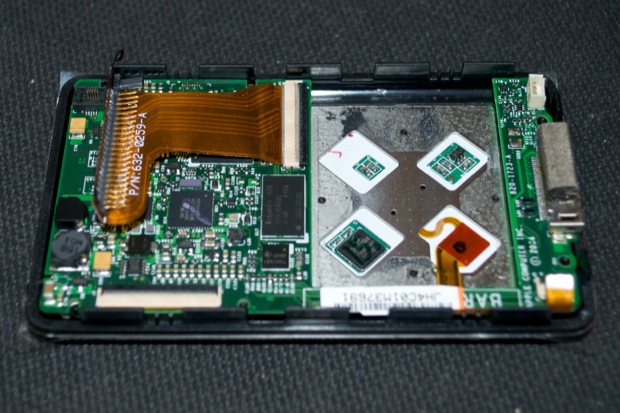
Back to the front panel. Next up is removing the hard drive ribbon cable.
It pulls right off. Set the hard drive off to the side. Don’t bang it around. They’re pretty delicate.
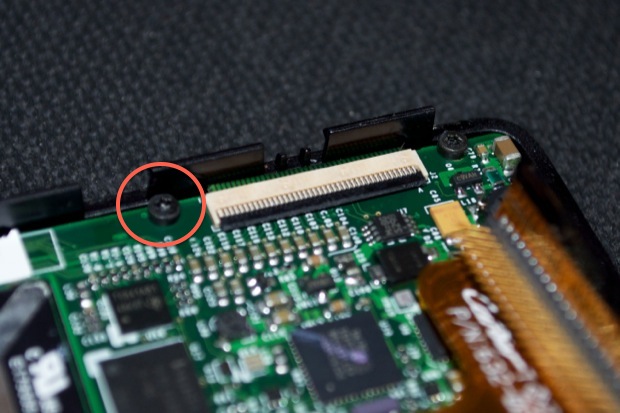
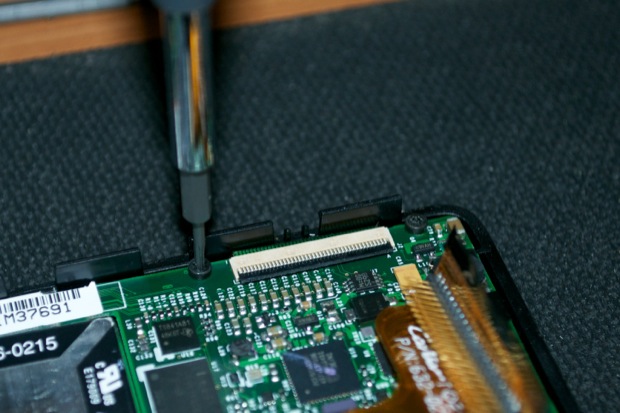
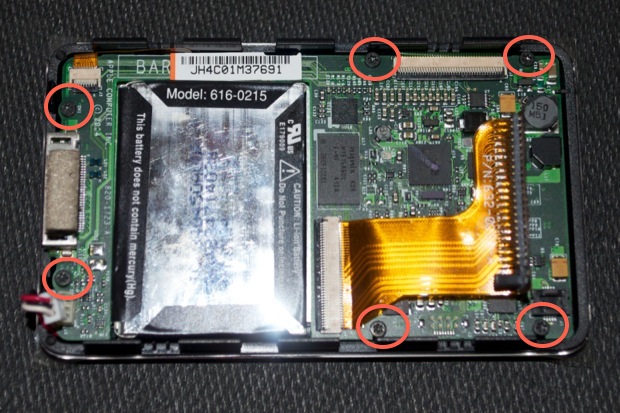
Taking out the logicboard requires the removal of 6 screws.
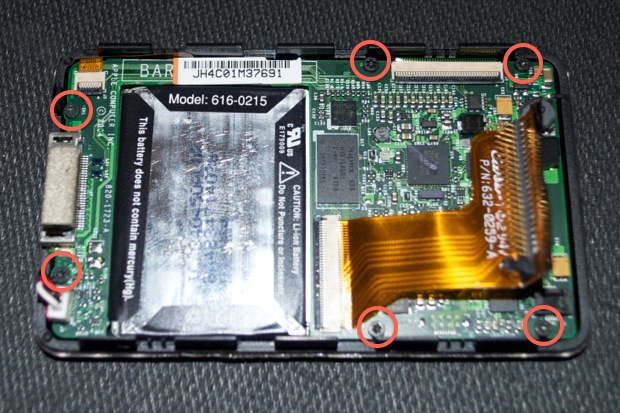
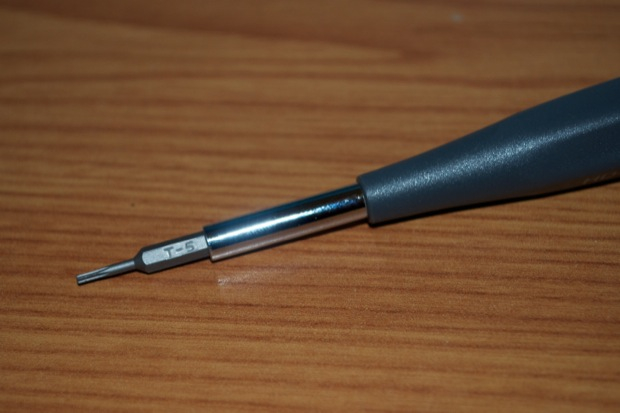
They are, however, not ordinary screws. They are T5 torx screws.
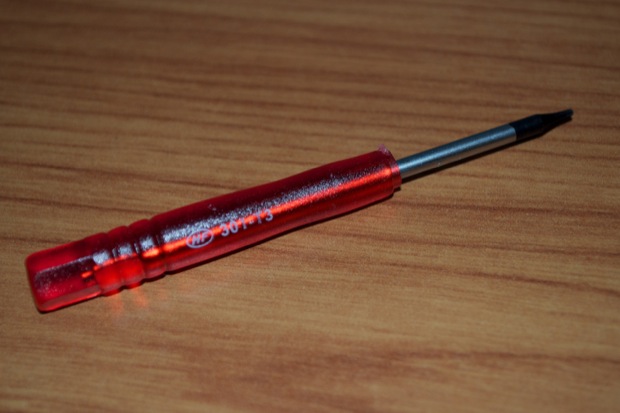
The front panel came with a torx driver. I thought that was a pretty nice gesture, since not everyone has a torx set at the ready. Unfortunately they sent the wrong one. This is a T3 torx driver and doesn’t fit.
Luckily for me, I have a full set.
I removed all 6 screws and placed them to the side.
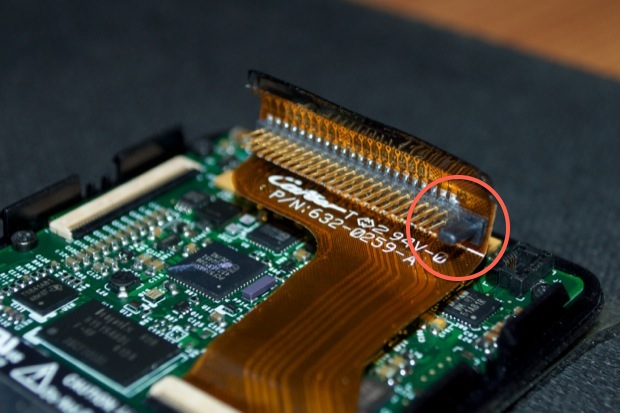
The front LCD is connected to the logicboard via this large ribbon cable. You can disconnect it if you want, but I find that you don’t really have to. It’s just one more connector that you have to be careful not to break.
Take your spludger and gently lift out the logicboard.
Don’t lift it too high. The bottom is still connected to the click wheel by a small ribbon cable.

To remove the ribbon cable, lift up the little black locking tab.
You can them pull the cable out.
Be careful lifting out the logicboard if the display is still connected. You don’t want the ribbon cable tearing.
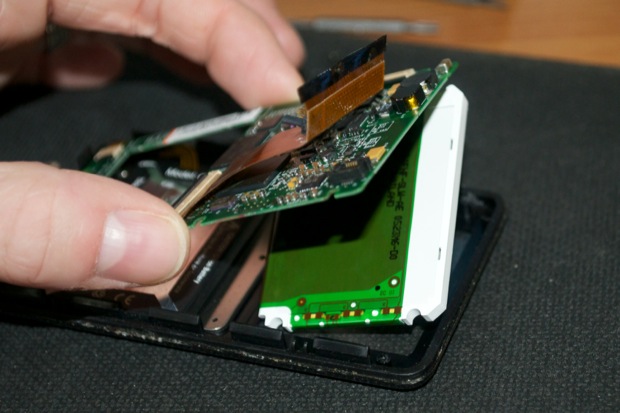
Lift them out together.
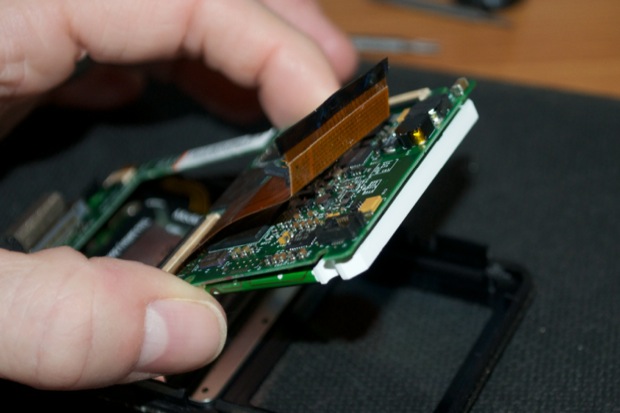
The whole thing should just lift right out.
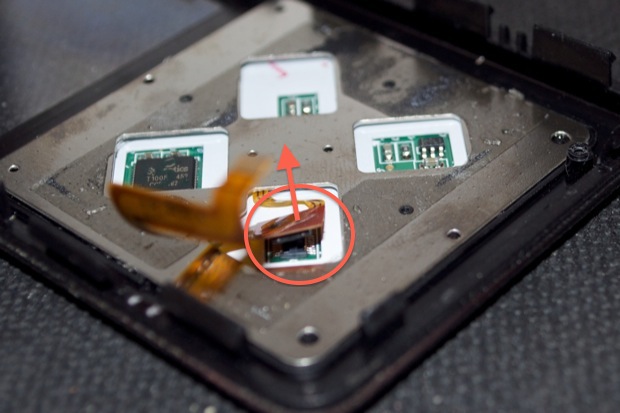
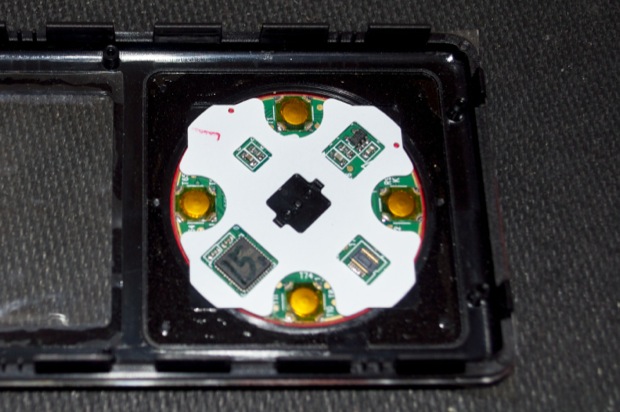
Take your plastic spludger and pry the battery off the click wheel plate. Be careful not to damage/puncture the battery. Also be careful not to destroy the click wheel ribbon cable that is underneath the battery. Depending on how much adhesive was used, it might actually be stuck to the back of the battery.
Once the battery is free, move it to the side.
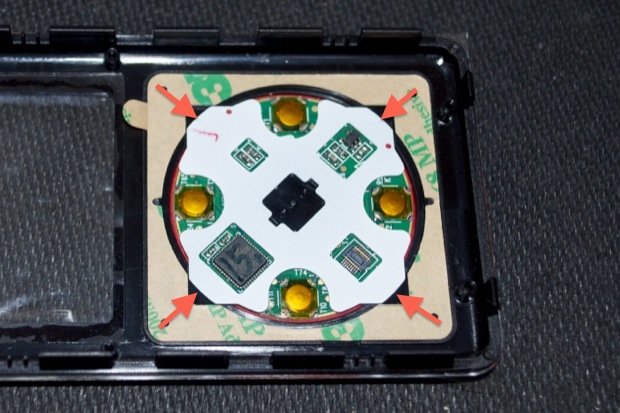
The click wheel plate is glued in. You’ll need something a little stronger than a plastic spludger to pry it off. If you look to the side of the ribbon cable, you’ll see a little gap in the trim that surrounds the plate.

I used a flathead screwdriver that was small enough to fit under the plate.
Pry off the plate, working around as you go.
Don’t lift it too high. The ribbon cable runs underneath the plate and is connected to the center select button.
Before you continue any further, pop off the connector and snake the cable through the hole.
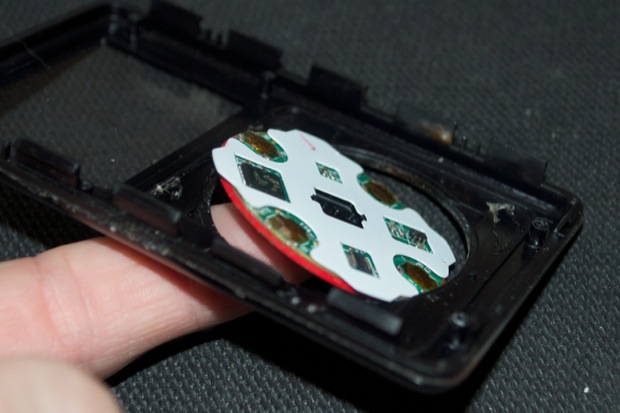
You can then lift the plate off.
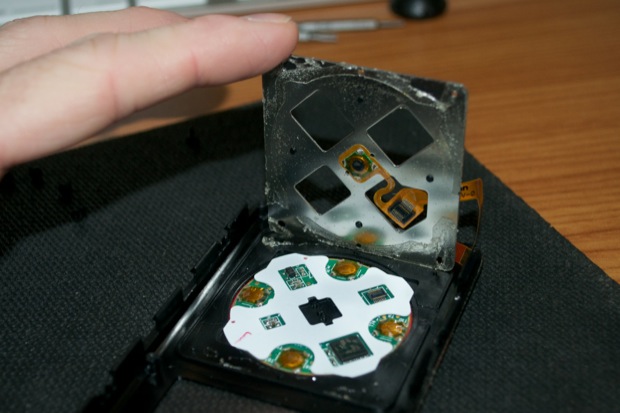
There’s now nothing left holding the click wheel in.
You can push it through from the front.
Now for the reassembly. Grab the new front panel.
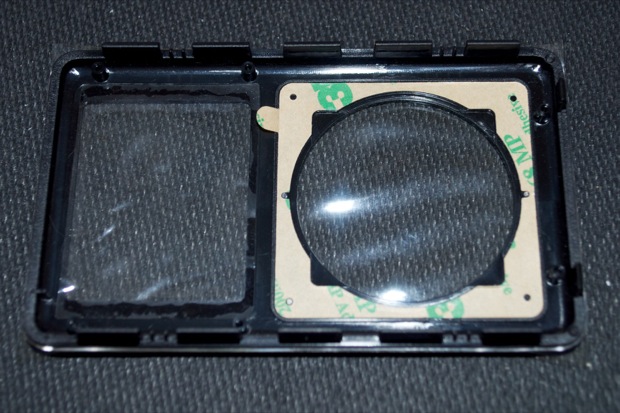
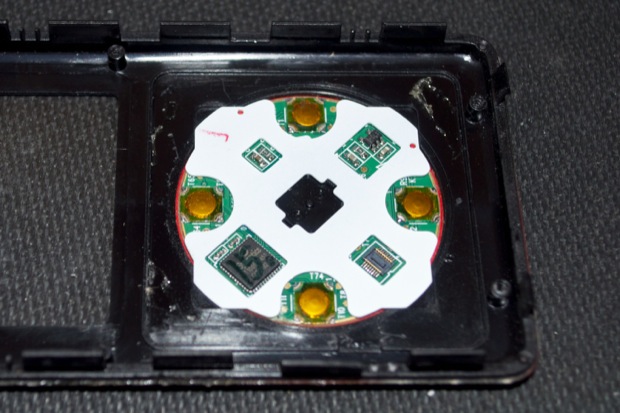
Drop the click wheel in by aligning the 4 tabs with the slots. You can flip it around and make sure the text is straight, but the tabs do a pretty good job of assuring that it goes in correctly.
Remove the film to expose the adhesive.
Secure the metal plate and reattach the connector.
If present, remove the protective plastic from the inside of the display window.
Drop the logicboard into the panel.
You can also drop the battery in at this point. Push the power connector wires under the logicboard so that the connector comes out from the underneath the bottom edge of the logicboard. Do not reconnect the power connector.
Make sure that the click wheel ribbon cable comes up from underneath the logicboard. Insert the ribbon cable into the connector and lock it in place.
Reinstall the 6 torx screws. Alternate tightening them so that the board sits flush. Don’t apply too much pressure to the board or you could crack it. Stop as soon as you feel the screw heads touch the logicboard.
Now is a good time to flip the iPod around and make sure that the display is aligned properly with the front panel. You shouldn’t see the display’s surrounding bezel.
Reconnect the hard drive. You’ll notice an elongated hole on one end of the drive.
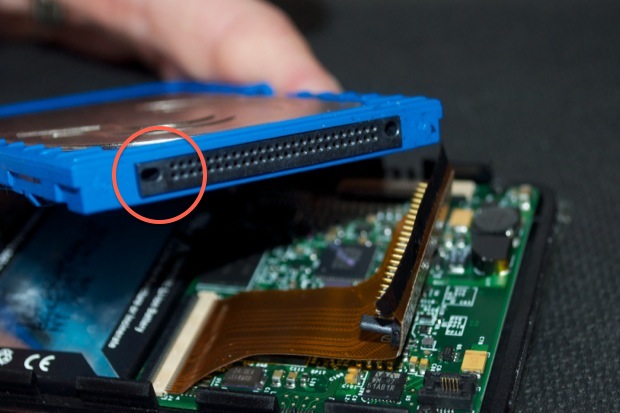
The elongated hole matches up with a post on the ribbon cable. It’s keyed so you don’t connect the hard drive backwards.
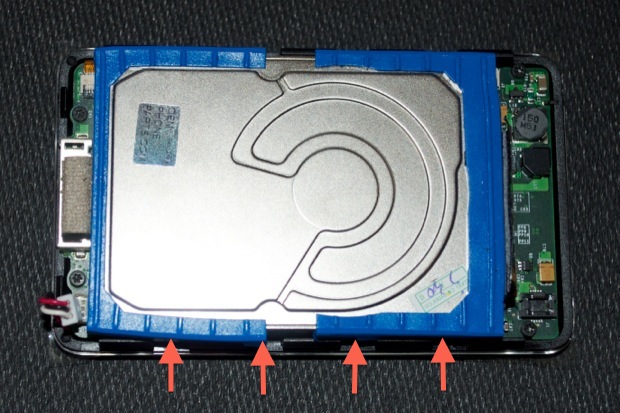
Lay the hard drive flat against the logicboard. You’ll notice that there are several gaps in the blue rubber bumpers. They correspond to the spaces in between the clips on the front panel.
Place the back panel agains that front panel.

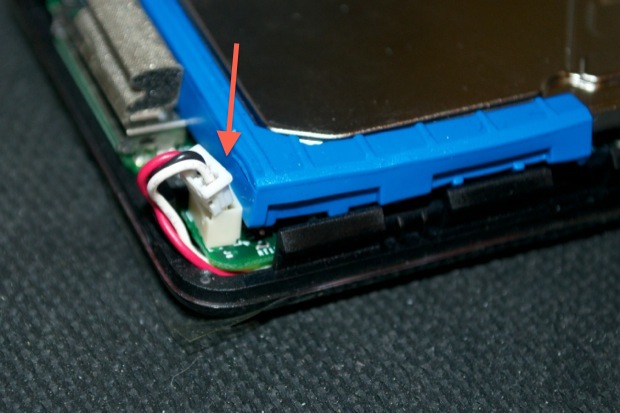
Connect the headphone/ hold switch cable.
Reconnect the power connector.
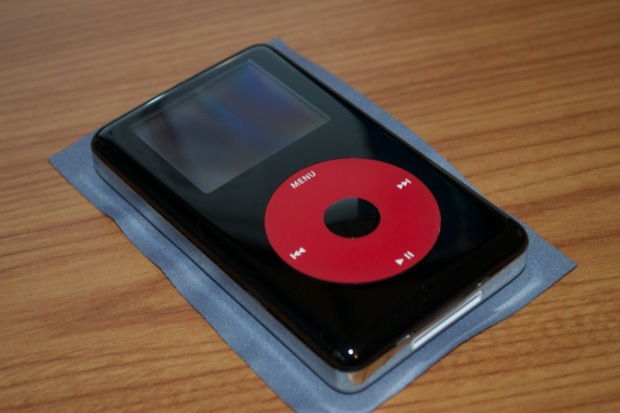
Work around the sides, squeezing them together as you go, until both sides click together. I’d hate to come this far and scratch the whole thing up on my desk, so I placed the iPod down on a soft cloth.
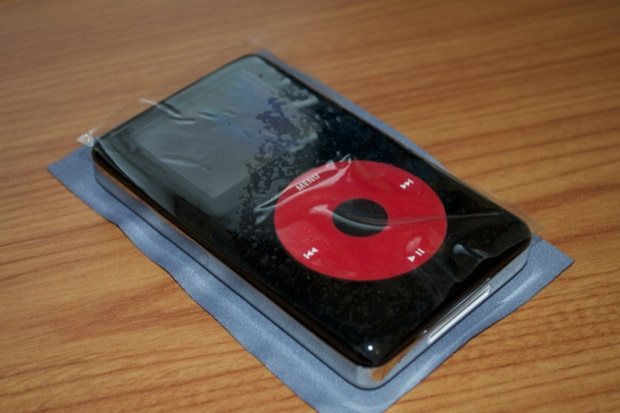
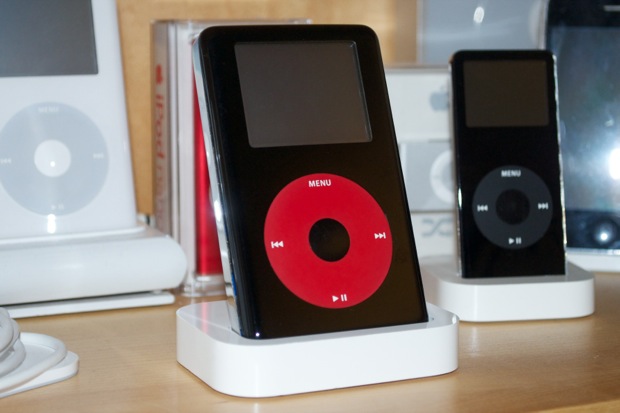
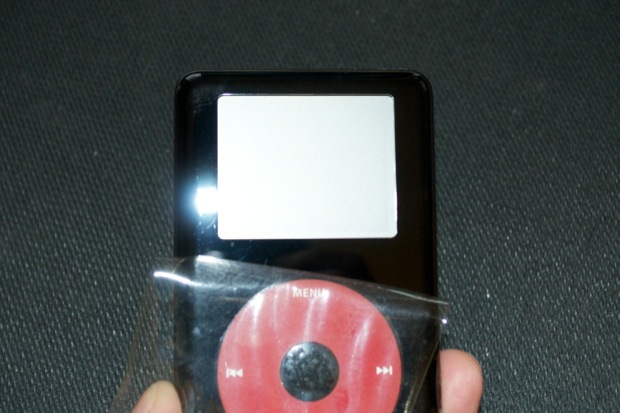
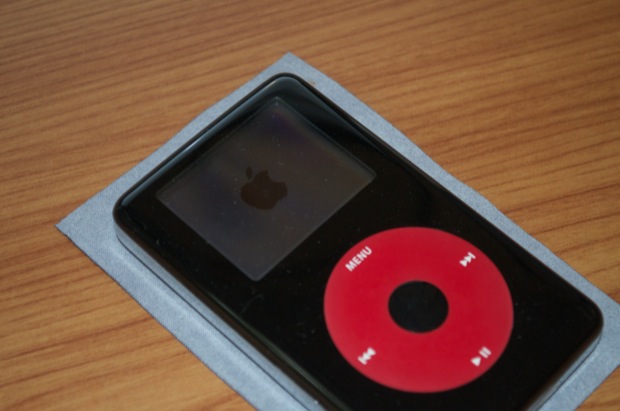
Wow! It looks like it just came out of the box!
Now for the moment of truth. Power up. It’s always a gamble when repairing an iPod. It’s not uncommon to put the whole thing back together for it to throw up a sad iPod icon and tell you to contact support. It’s almost as if opening up the iPod lets the magic out, leaving you with an iPod that just goes “click, click, click, click”.
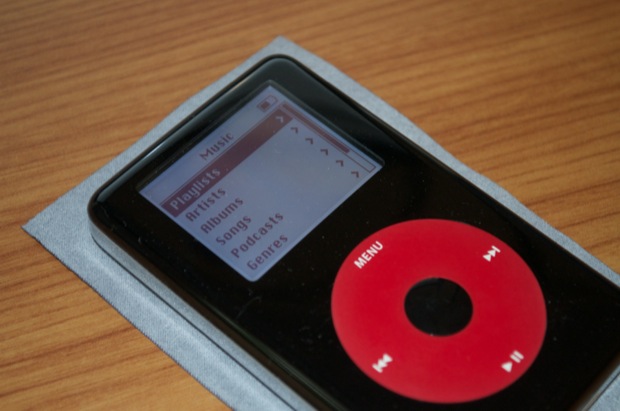
Yeah! That looks like one healthy iPod.
I’m really happy with the way it came out. It looks amazing; just like the mint ones you see on eBay for $300.