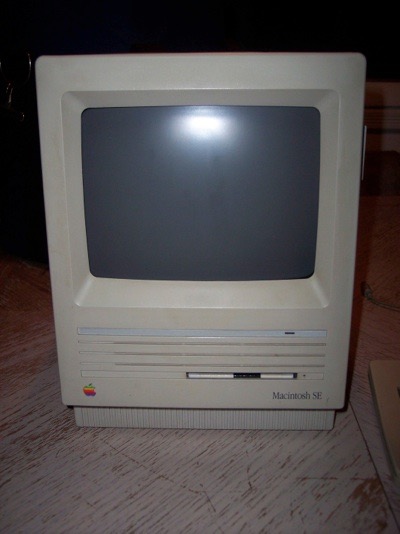
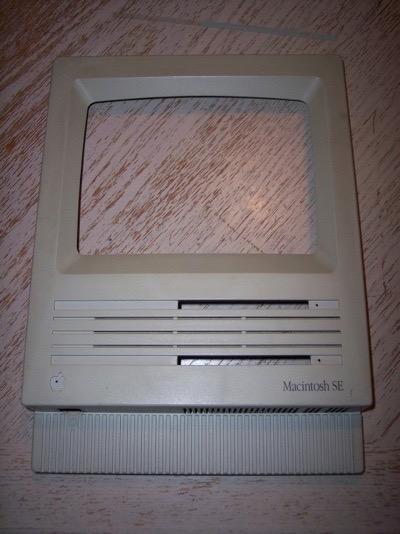
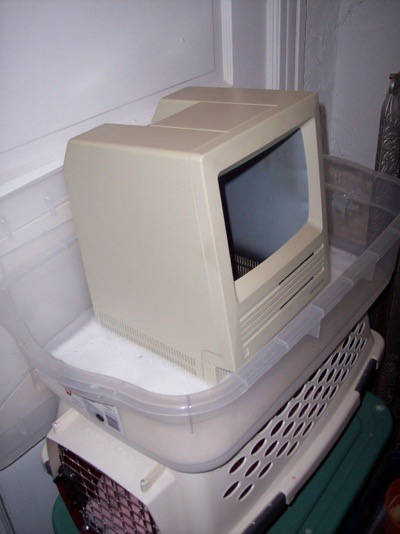
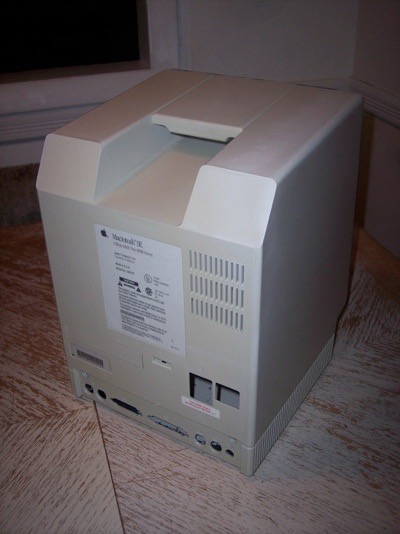
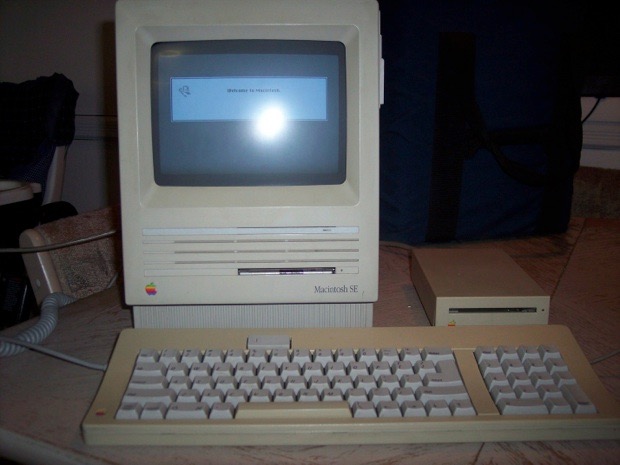
The SE is going to need some serious time in the peroxide if I’m to get it back to its original color. It is very, very discolored.
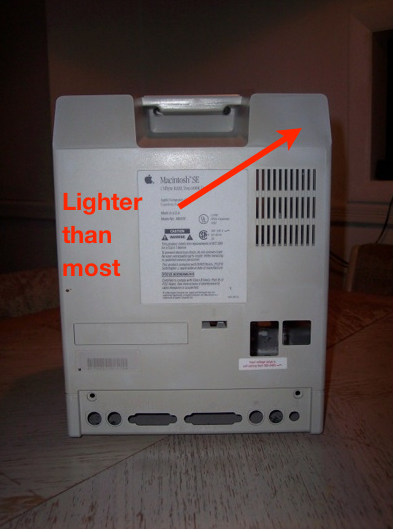
Time to dig in. First, remove the 4 case screws.
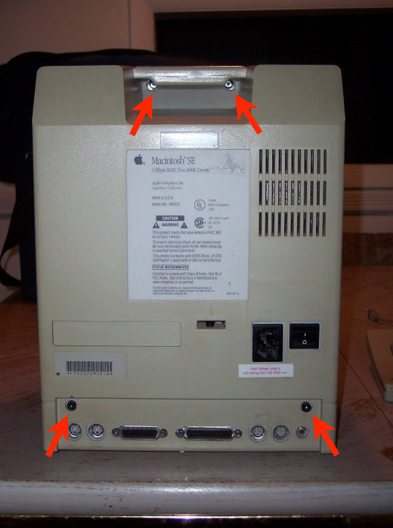
Since Classic Mac case opening tools are scare, you’ll have to resort to popping the case open with a screw driver. Be careful not to gouge out the plastic.
Gently work around the whole case until the back if free from the front.
Once freed, slide the back cover off.
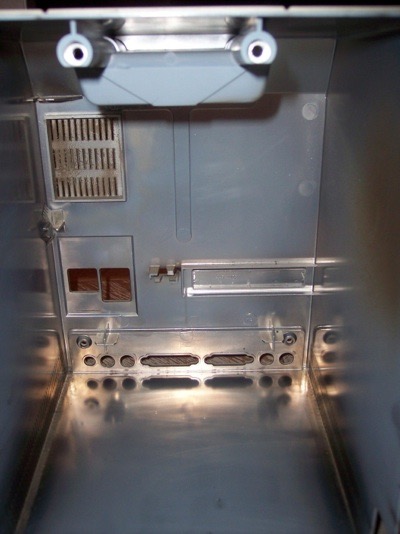
Sadly, the interior of an SE is not engraved like its predecessors are.
The back panel just slides off. You may have to give it a wiggle.
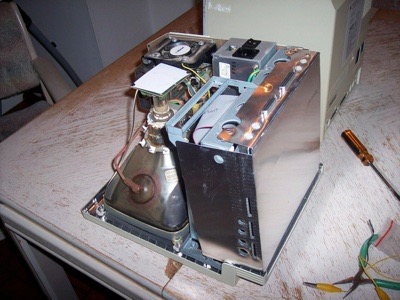
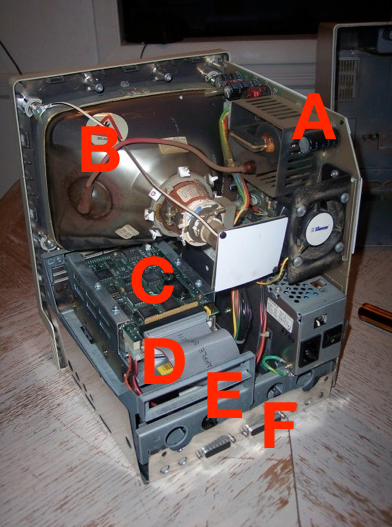
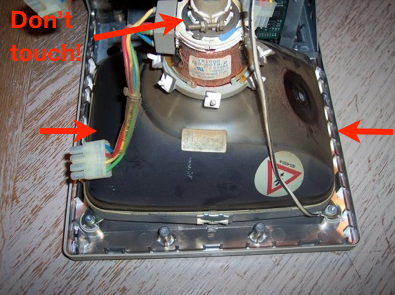
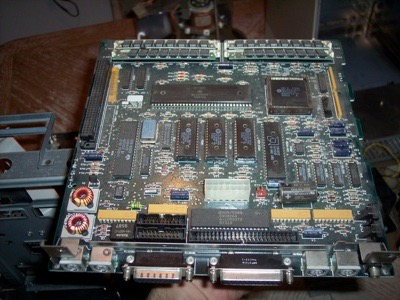
Here’s what you’re looking at:
A. The sweep/power supply board
B. The CRT
C. Hard Drive
D. Floppy Drive
E. Main housing assembly
F. Main board
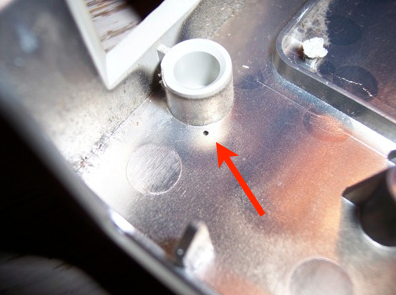
The first thing you have to do is discharge the CRT.
WARNING: This is very dangerous business, so be very careful. These CRTs can hold up to and in excess of 10 KV! You’ve been warned!The grey suction cup thingy on the back of the CRT with the red cable is called a “yoke” Behind the yoke is a small metal clip. You have to short the clip to the grounding nut on the frame.
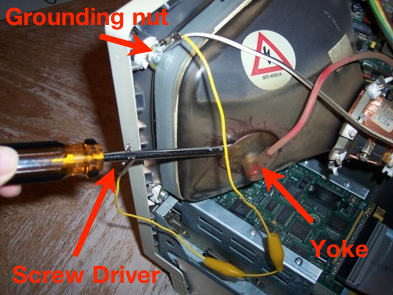
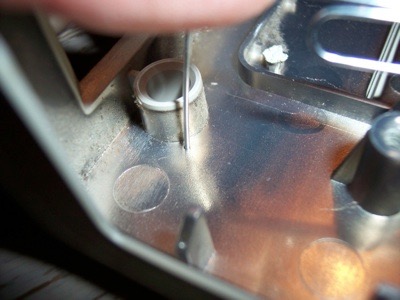
Now that the CRT is discharged, I can touch it. Pulling back on the yoke shows the metal clip. You have to squeeze the sides together to get it out. It’s kind of like a binder clip.
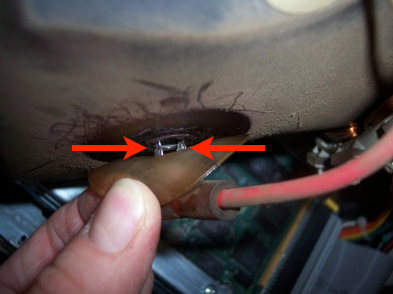
Just reach in there with a pair of pliers and squeeze together...
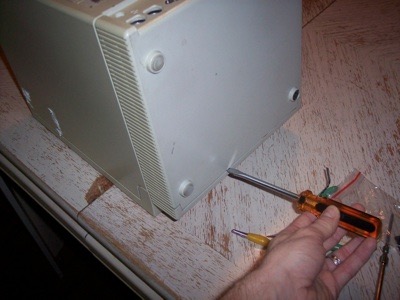
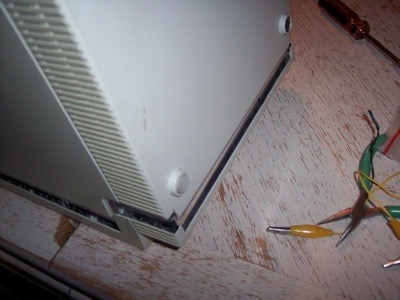
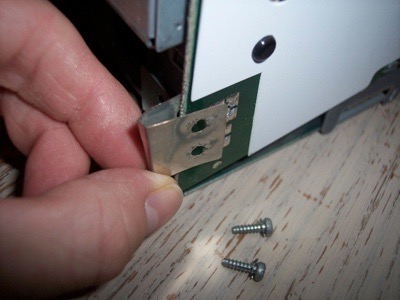
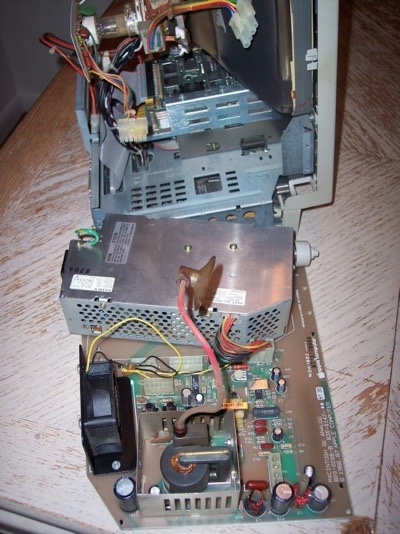
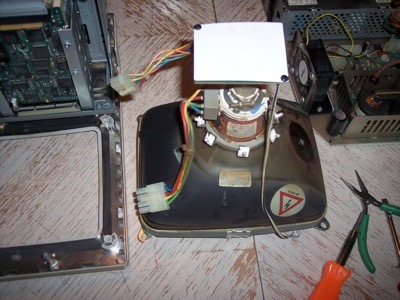
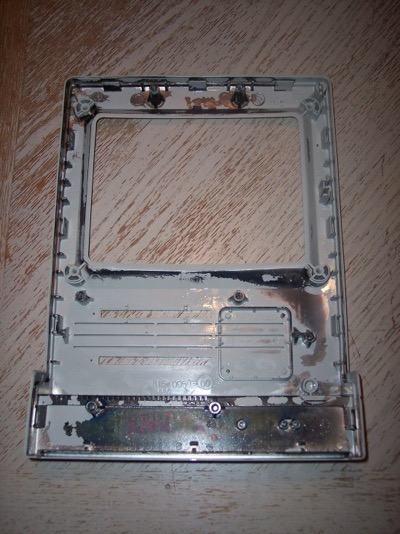
Remove the bottom shield. It is not secured and will come away from the machine easily.
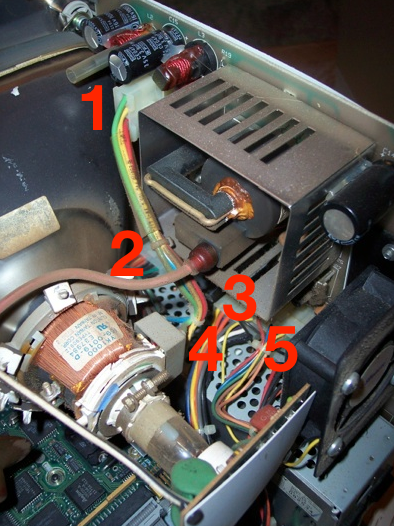
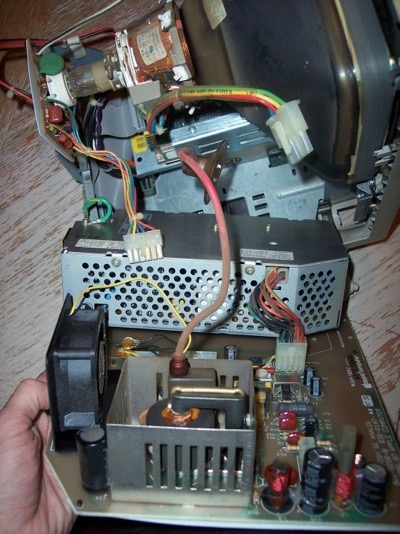
This is the power supply and sweep board. It is connected to the rest of the system by 5 cables.
Some are easy to reach. Some are not. I guess it all depends on how big your hands are. But if you try and reach down there to disconnect them, you can run the risk of slipping and damaging the back of the CRT. So give yourself a break and remove the board first before attempting to disconnect the cables.
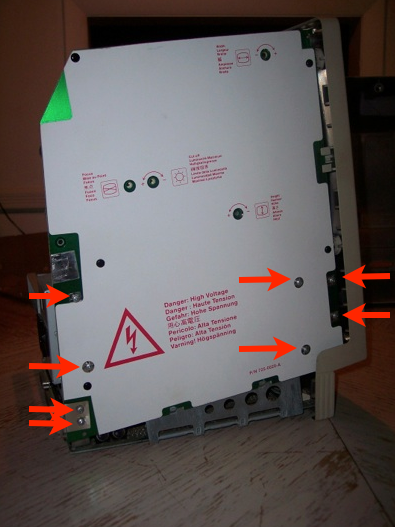
Spin the unit around to its side and locate the following 8 screws. They all have to be removed.
This bracket also comes off once you remove these two screws. Make sure you take note of which side is facing out. Make sure it goes back on the same way during reassembly.
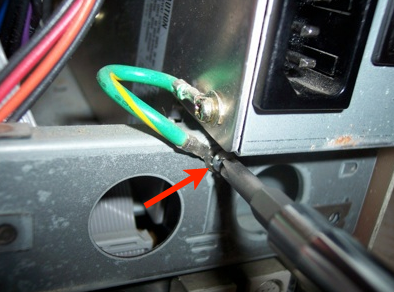
Disconnect the power supply ground wire from the main housing. You only have to remove the one screw.
The board should now be loose. While holding the board steady, remove the top connector.
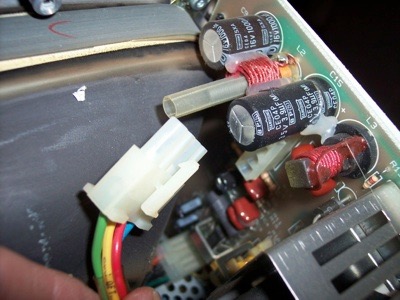
Gently ease the board out enough to reach the following 3 connectors. They are right above the power supply.
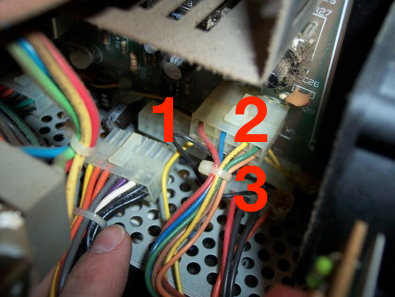
Continue to ease the board out being careful not to damage the display brightness knob.
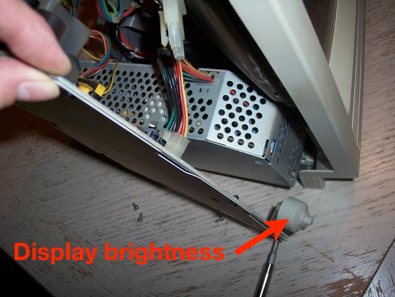
Once the board is disconnected and the display brightness knob is free, the board should simply fall away.
Tip the unit over and remove the 4 CRT screws.
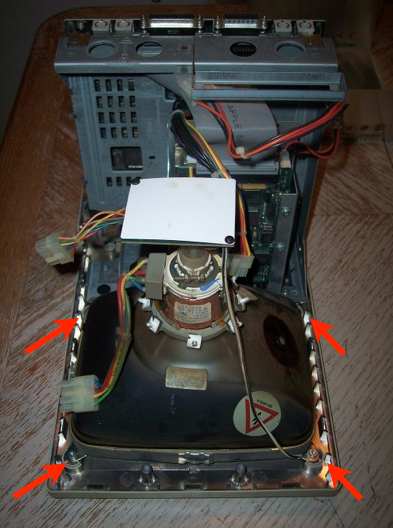
Lift the CRT from the sides.
Remember, hold the CRT from the sides, don’t touch the back coil or wires.
Lift the CRT out of the frame and place it in a safe spot.
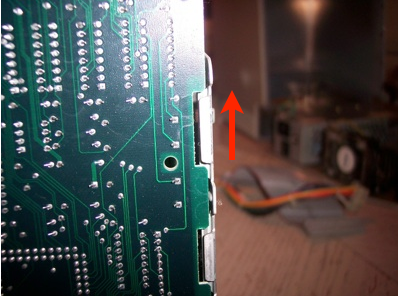
Disconnect the hard drive and floppy drive ribbon cables.
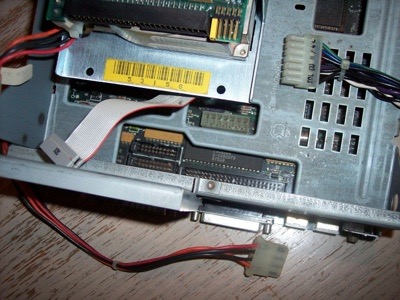
Notice the notches cut out of the main housing. They help retain the logicboard.
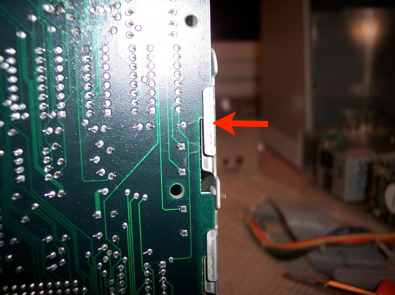
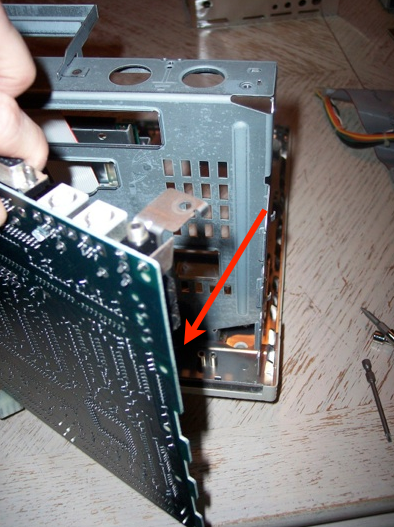
Grasp the logicboard and pull it up until it is free of the notches.
You can now swing the logicboard out.
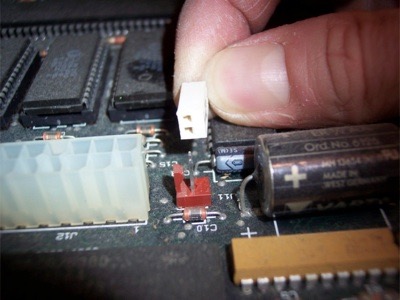
Disconnect the speaker connector.
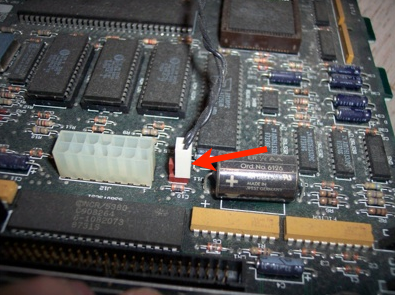
Take note of its orientation.
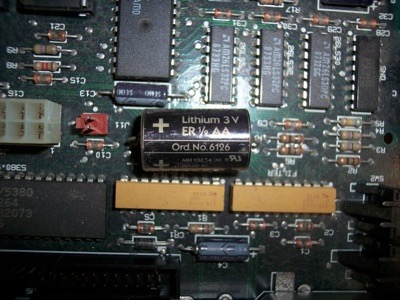
And there she is, in all her glory. Check out that 68000!
Pray you never have to change this battery. It is soldered to the logicboard. I wonder why it was user replaceable on the Mac Plus, but not on the SE?
Remove the 3 screws from the main housing.
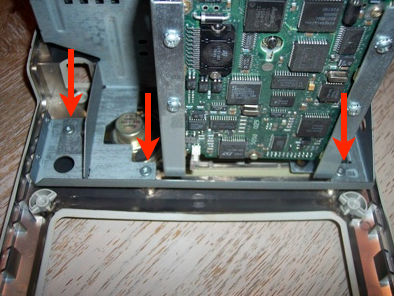
Swing the housing around and remove 2 more screws.

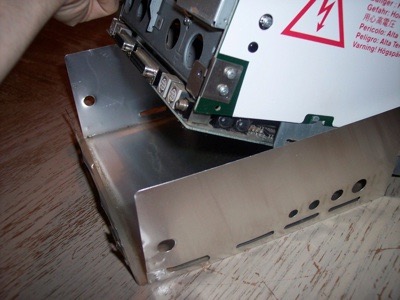
The main housing should now be free.
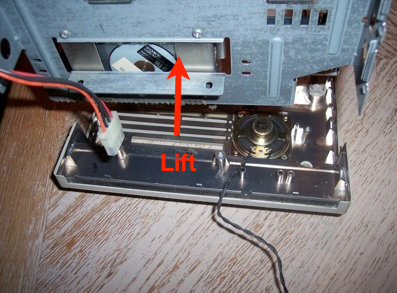
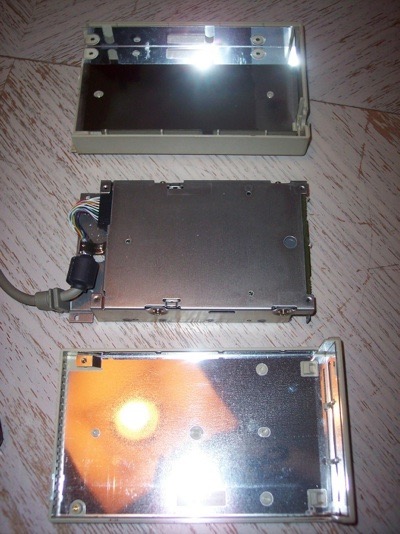
If you wanted to remove the floppy and hard drive caddies, you could do so by removing these 4 screws.

Something you’ll find on the SE that you wont find on the previous models is the speaker.
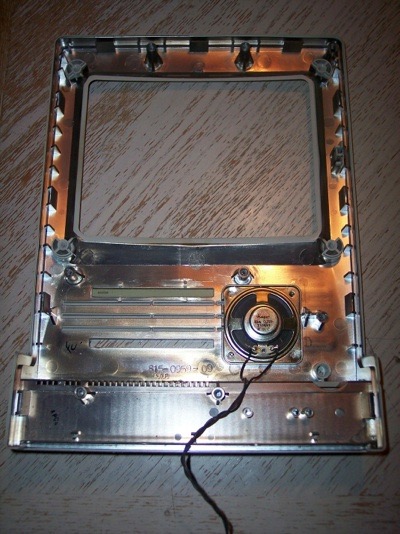
The speaker sits on 4 plastic posts, 2 of which have been melted over to secure the speaker to the frame. You have to take a knife or screwdriver and scrape off the plastic.
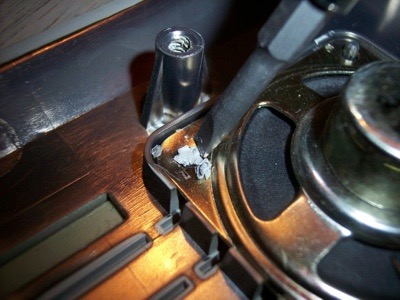
You then simply put the screwdriver underneath from the side and pop the speaker off. Since the other two legs have not been melted, you can melt those two over when you reassemble it. Or, you can just give it a dab of hot glue.

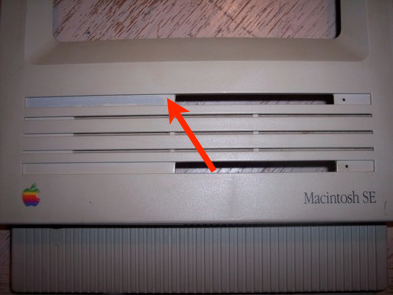
I removed the plastic strip that covered the top floppy drive slot. I’ll have to clean off the extra adhesive.
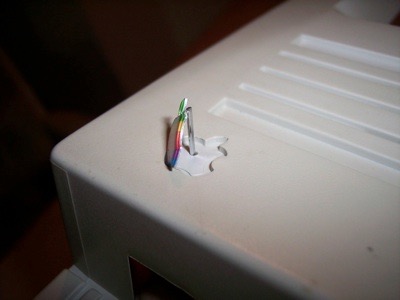
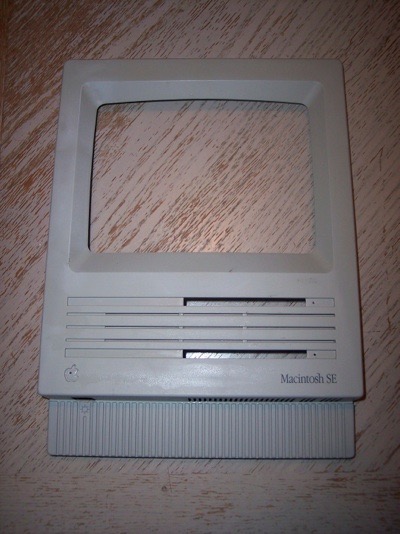
Save the Apple logo.
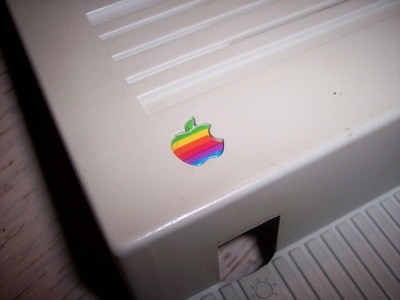
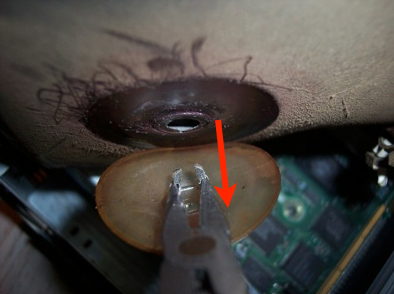
Find the hole on the opposite side.
Push a paper clip or small drill bit in the hole and pop the Apple logo out.
And that’s it!
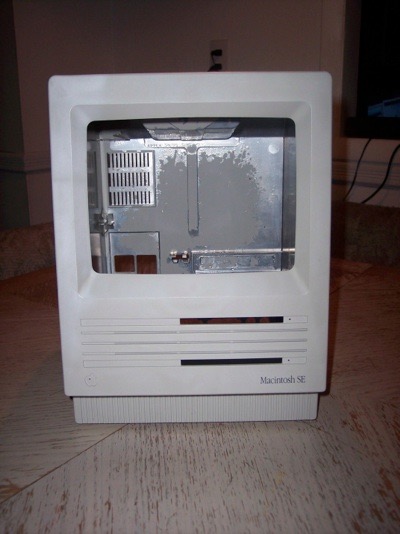
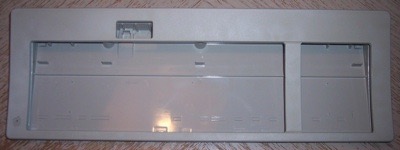
The front panel is all ready for the peroxide treatment.
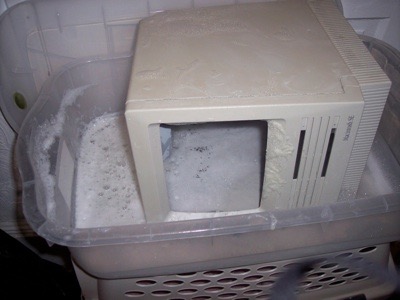
I removed the UV lights for the shot, but once the solution went “critical mass” I rotated the case and returned the lights to the solution.
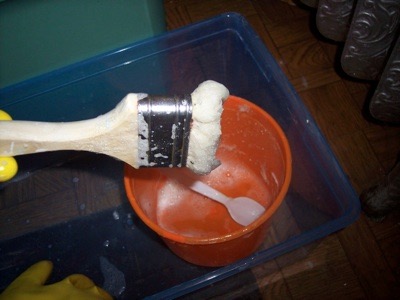
I kept rotating it every 15 minutes. I’d also give the hard to reach places the treatment with a 3” brush...
...which eventually melted. Don’t use a synthetic brush.
After a few hours the solution had lost its “oomph”. I removed the case and washed it off. I let it dry overnight.
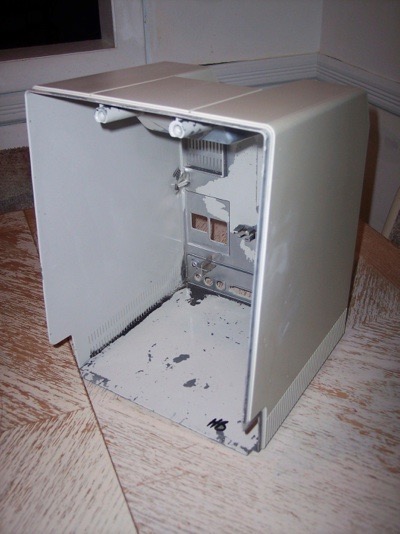
As you can see from this shot, the metallic paint in the inside has been pretty much removed. I hope that’s not a problem with grounding/static shock.
Much of the yellowing has been removed, but it could definitely use another dose.
The metallic paint on the front panel did not survive the treatment either. It just washed right off.
Some spots are a little patchy/ashy. It looks more like it was previously cleaned with bleach or something. i think I overcooked it.
I hope that with a second treatment, the finish will even out. Hopefully I don’t make it any worse.
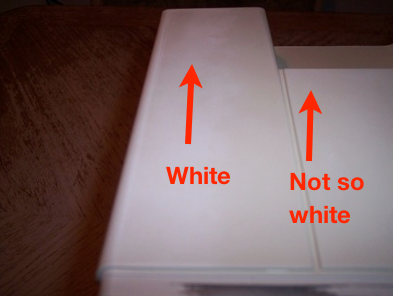
See, patchy. You can see that the left side of the case is a lot whiter than the section on the right.
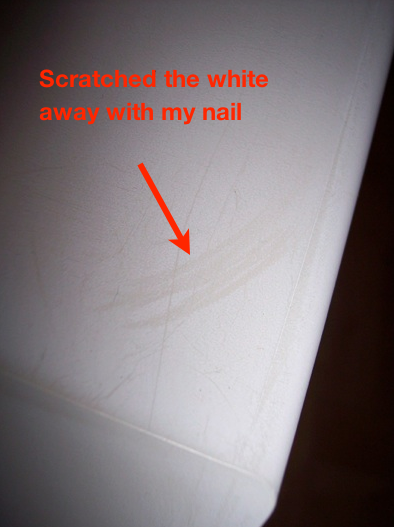
Heres the back after another dose. I still think it looks a little yellow and patchy. I don’t want to bleach it like the LC III. Some spots are whiter than others, but if I scratch it with my nail, the white actually goes away. It’s not like it’s some kind of residue because nothing comes off on my nail. I think it’s more like “felt”. In the sense that it looks darker from one side than it does from the other. I wonder if I can get ride of it if I take a plastic scouring pad to it.
See the scratch marks? The top left hand side of the case is especially white, but it goes away when I scratch it. So I think I’ll have to find something to “scratch” the whole case. I guess it’s safe to say that I made the same mistake as I did with the LC III. I made the solution too strong and I bleached it.
 Now for the peripherals...
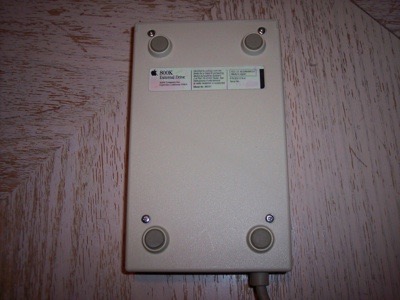
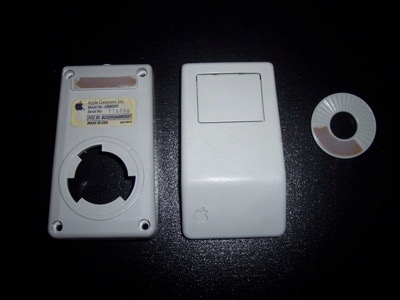
Disassembling the external floppy was a snap. Just 4 screws on the outside, and 2 on the inside.
The floppy case is pretty bad. Look at those feet!
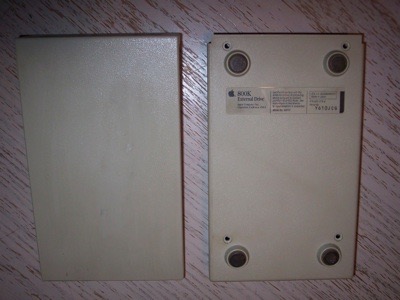
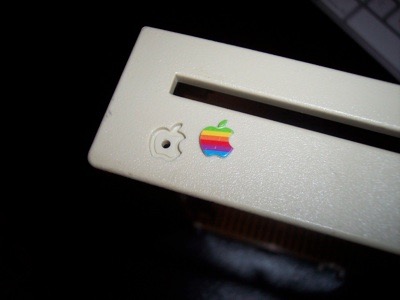
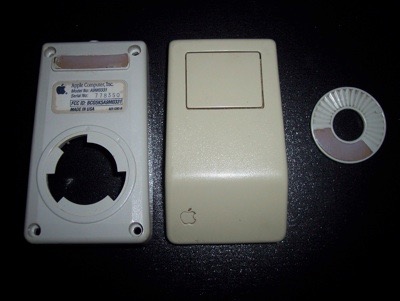
Save the Apple logo!
Here’s what it looked like after an hour or two in the solution. Not bad.
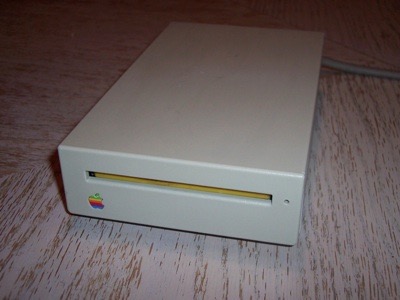
There’s some slight discoloration on the label, but I think the feet came out nice.
The keyboard is probably the worst part of the whole setup.
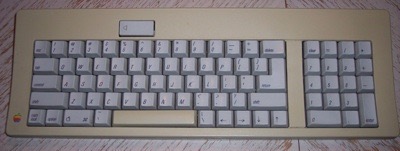
A little ashy, but it cleaned up nicely after just a few hours.
The mouse is not as bad as the floppy drive and the keyboard, but it’s still pretty ugly.
The mouse looks perfect after about 2 hours in the soup.
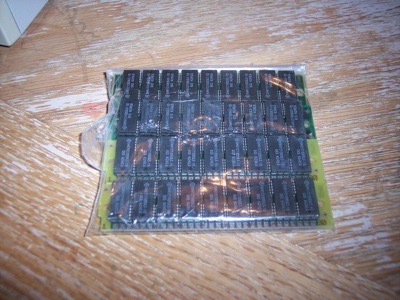
 Upgrades...
I picked up another 4 Megs of RAM for $3 bucks on eBay. I wanted to max this thing out. Also, you need more than 2 Megs if you want to run System 7.
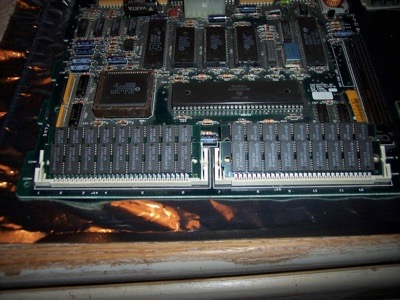
Out with the old, in with the new.
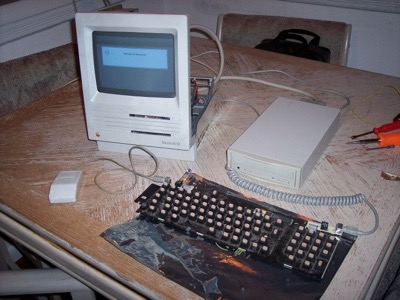
I pulled the hard drive from the SE and put it in the LC III. This way I could use the SuperDrive in the LCIII and install system 7.1, along with a CD-ROM driver.

I burned all the old files onto a CD from my Mac Pro. I was then able to connect the SCSI CD-ROM drive that came with the LCIII to the SE. It worked perfectly. I was able to move MacPaint, MacWrite, some games, and System 6 and 7 files to the SE’s hard drive.
Upgraded:
4 Megs of RAM
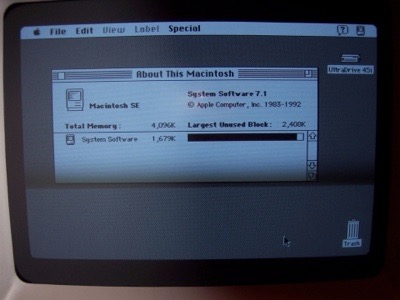
System 7.1
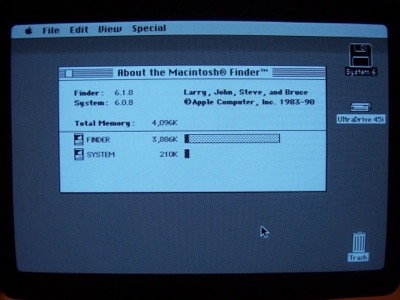
I was also able to create a System 6.0.8 boot floppy for the Mac Plus.
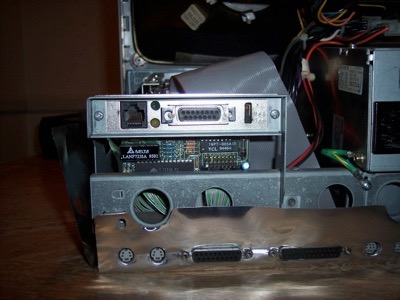
I scored this MacCon Ethernet adapter on eBay for $20 bucks. Installation was a snap. I just have to install the driver.
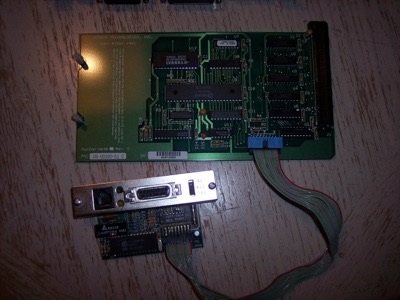
This thing is huge!
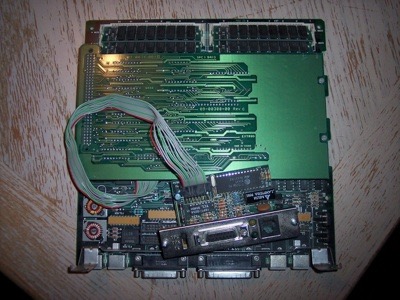
Installation was a little tricky, but not too bad.
Now for the final before and after shots.
Not too shabby. A little ashy, but what a difference. I think maybe I’ll make the solution a little weaker next time. I think it’s too strong and it’s burning the plastic.
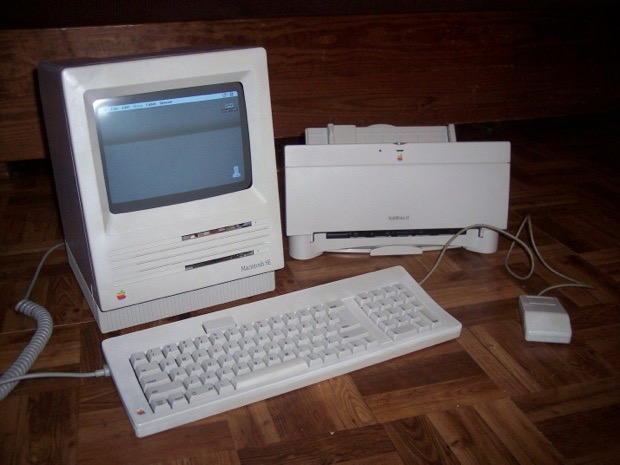
What a nice addition to my Apple museum!