When I was a kid, my Dad had a Thunder Scan. It was basically a scanner head that you connected to your ImageWriter.
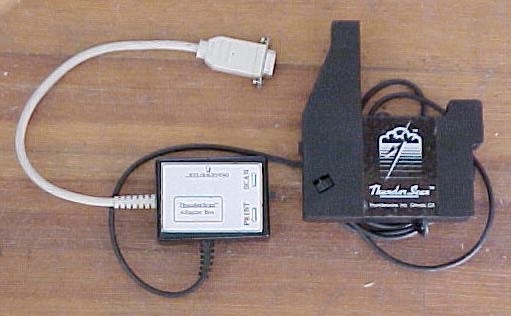
To use the Thunder Scan, you took out the ImageWriter ribbon and popped in the Thunder Scan. You’d then have to feed your document through the ImageWriter and scan it in line by line. It was like reverse-printing. The disadvantage to that was that you could only scan a piece of paper. Say you wanted to scan a magazine or a box, you couldn’t do that with the Thunder Scan. Well, you could scan the magazine, but you had to ruin the magazine by tearing out the page.
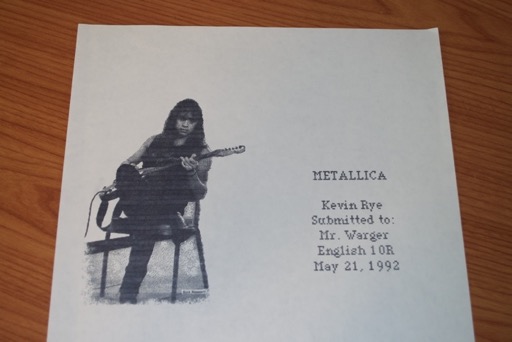
I used to tear pages out of Metal Edge magazines and scan in pictures of my favorite bands. I’d clean them up in MacPaint and then print them out. We even had a ribbon that you could use to make prints that you could then iron onto t-shirts. Free band shirts! Sweet.
I used to like to scan in images and include them in my school reports, just to impress the teachers. Most kids didn’t even have a computer, let alone the ability to scan and print. I still have some of my stuff. Here’s a report I did on Metallica 20 years ago. I scanned in a picture of Kirk Hammett and added it to the cover for the finishing touches. Very cool.
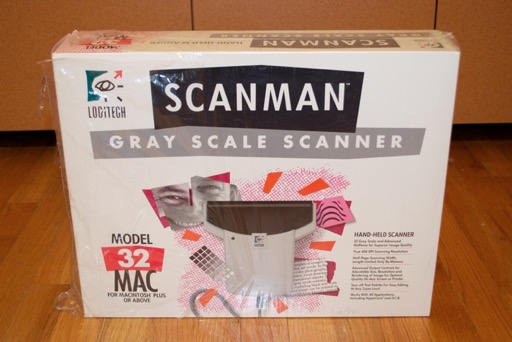
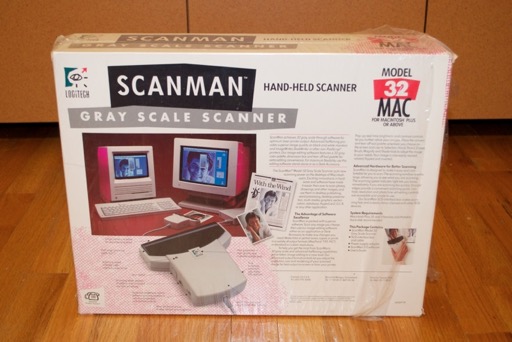
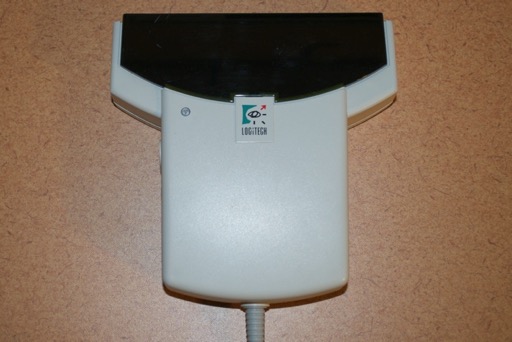
Although the Thunder Scan was cool, I have something cooler. Enter the Logitech ScanMan.
A friend of mine at work hooked me up with his old ScanMan a few years ago. It’s been connected to my Mac all this time just for show. I’ve never used it. I think it’s time to finally try it out.
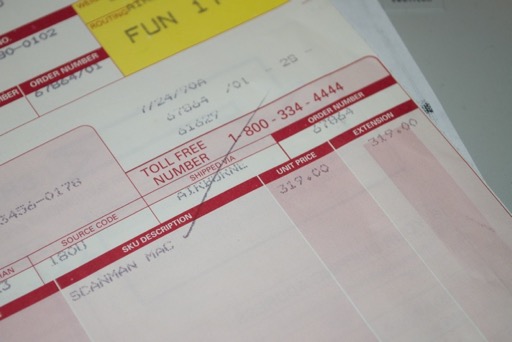
Original invoice. The ScanMan cost $319 bucks! Wow!
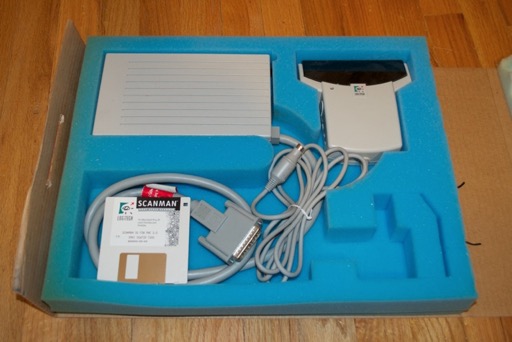
It looks like I’m missing the manual and the power supply. Not a problem. Manuals are for dummies and I have a spare 12V adapter lying around. At least I have the software.
Let’s have a closer look.
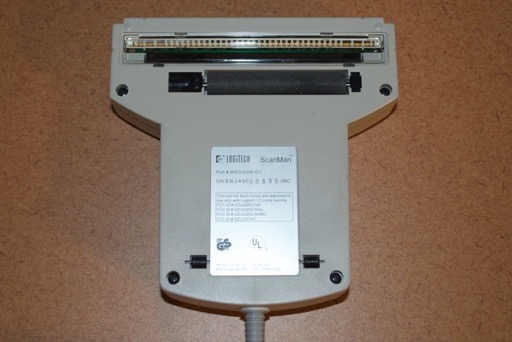
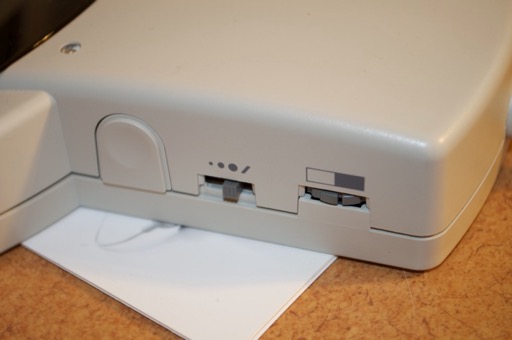
Being a SCSI device, you’ll find a SCSI ID switch on the back. I set mine to 4 so it would play nice with my Zip Drive and 80SC.

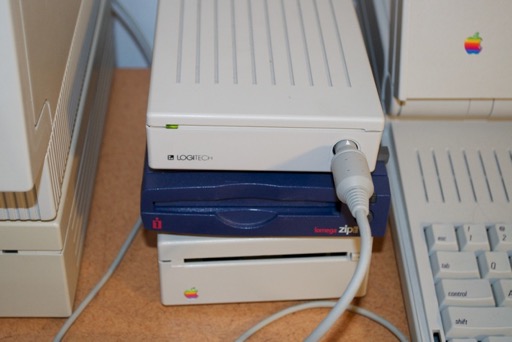
I connected it to my Mac SE and plugged in my generic 12V adapter. I connected the scanner to the front and powered it on.
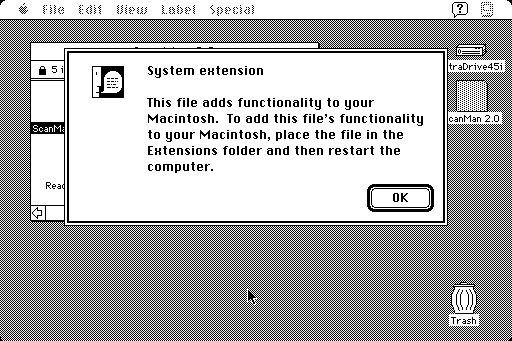
I popped the floppy in and launched the ScanMan Driver.
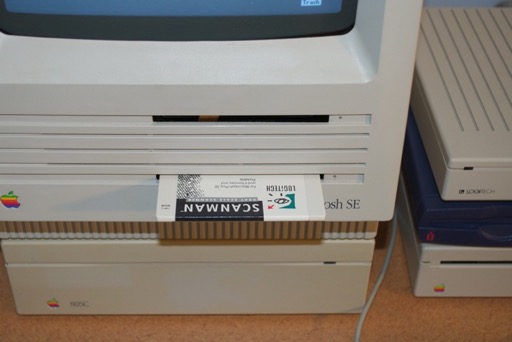
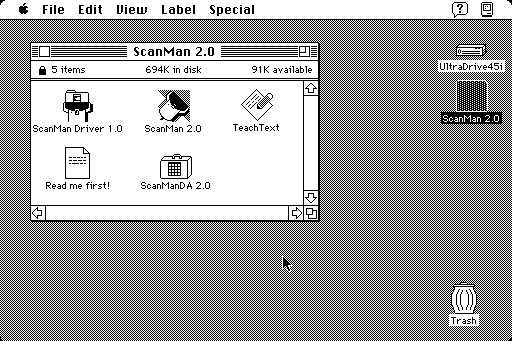
You are instructed to simply drop the driver into the Extensions folder of your System then reboot. I also copied the ScanMan utility to my hard drive and ran it from there. You can’t run it from the floppy or it complains that the driver is not installed.
Before you start scanning, take a look at the side of the scanner. You’ll notice a switch the varies the size of the dots that it scans. You’re basically setting the scan resolution. There’s also a contrast knob.
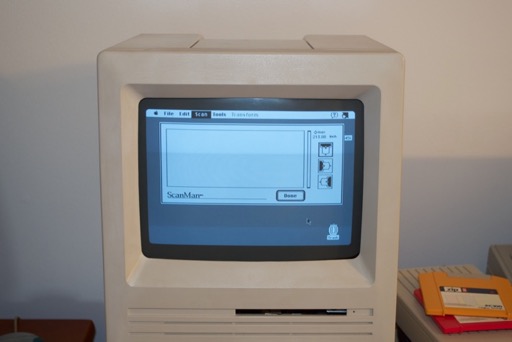
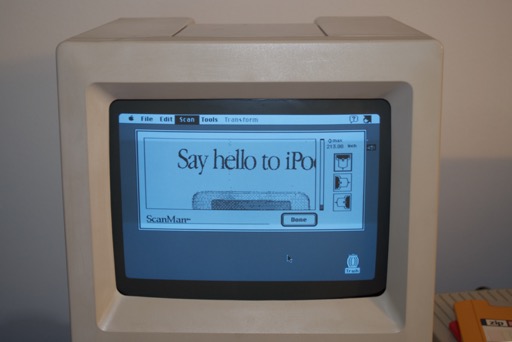
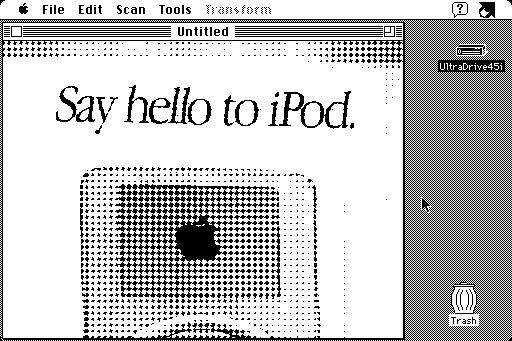
Once the ScanMan utility is up, you just select “Scan” from the menu bar. There’s an option to “Scan Line Art”. Select it and up pops the scanner window. I had to take a picture of the display since Command+Shift+3 didn’t seem to work while the ScanMan utility had focus.
The optics on the ScanMan will illuminate. Just press and hold the switch on the side of the scanner while you slowly and evenly scan over your document.
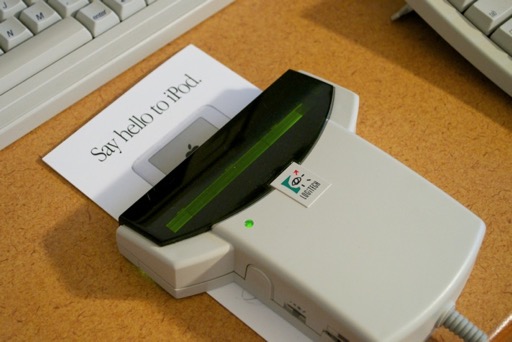
The output will appear in the scanner window. There’s limited real estate there, so the scan will continue to wrap around the window as you drag over your document.
Let’s try a few scans and play with some of the settings.
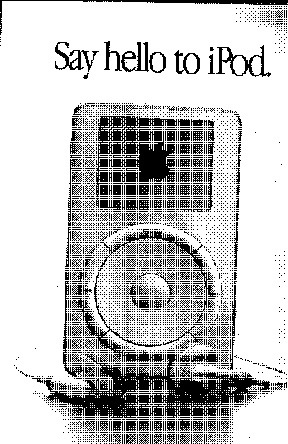
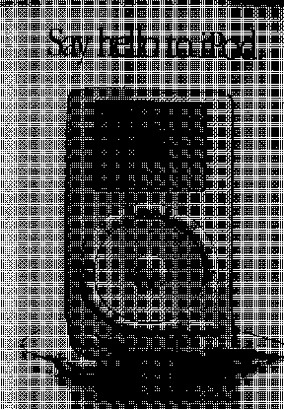
Setting the resolution switch to the smallest dot produces a more detailed image. The images exhibit a strange crosshatching effect when viewed on a large monitor. It’s not apparent when viewed on the Mac SE. Then again, the resolution is 288 x 429, so it probably has to do with the scaling. I’ve seen the same kind of cross hatching when scaling vintage screen shots of the Finder.
Scanning with the largest dot produces an image that is less detailed.
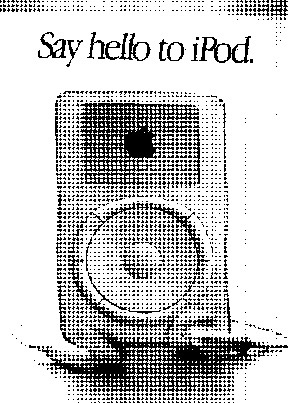
Setting the switch to the “line” position basically tells the scanner to just pick up the hard lines.
As for the contrast, that’s fairly obvious. Lighter is lighter, darker is darker. Again with the crosshatching.

Once you’ve scanned your document, press Done and the full 288 x 429 image will appear. There’s a few tools, like a paintbrush and an eraser, you can use to clean up your scan. You can then save it.
I know the results definitely leave something to be desired, but were’s talking 1989 here. This was probably state-of-the art 23 years ago. I can only imagine how amazing it must have been to be able to scan something into your Mac like this. It does take some practice to scan in your document so that the image is straight. The software doesn’t offer any kind of correction or compensation for that. With the Thunder Scan, the images came out nice and straight because your document was being feed thought the printer.
If anything, the ScanMan could give you a nice base image to start with. You could then take it into MacPaint and clean up, add text, etc.
Very cool.