My
new G4 Cube is way more tricked out than my
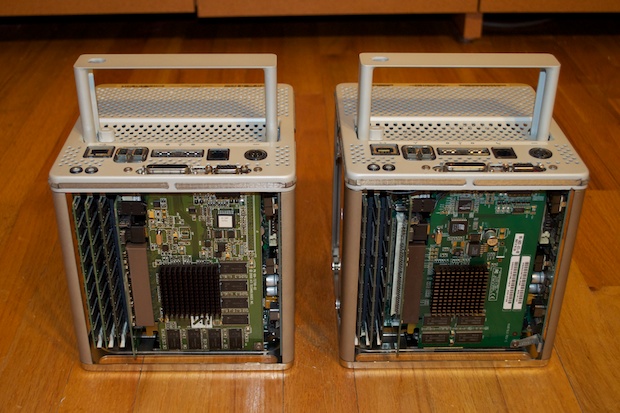
first Cube. However, my first Cube has a cleaner enclosure, more RAM, and a 17” Studio Display. Almost everything about my new Cube is better: bigger hard drive, better graphics card, and a faster CPU. The one downside is that my new Cube has a damaged USB port.
Since my other Cube does have a near-flawless enclosure, it would be nice to just swap cores and throw in an extra 512MB stick, but knowing that USB port is damaged will bother me to no end. It must be flawless!
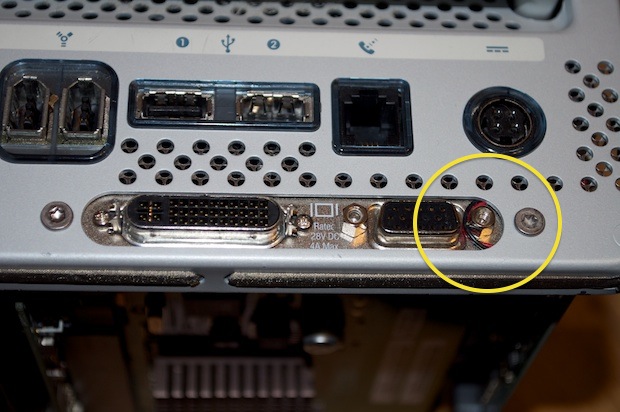
Here’s the port:
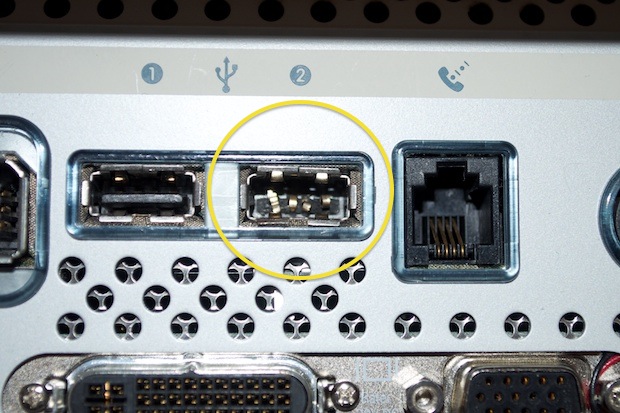
The plastic part in the middle is broken right off and the pins are all bent. I had to straighten them out a bit as not to cause a short. Another thing too is that the power cable to the internal fan it sticking out from the video card. I’d like to remove the video card and reseat that cable.
I popped both cores out and laid them side-by-side. I then did the RAM shuffle from one to the other.
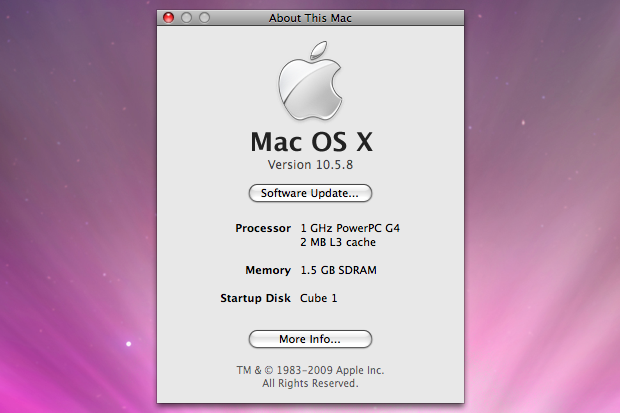
Now my new Cube is maxed with 1.5GBs of RAM. Sweet.
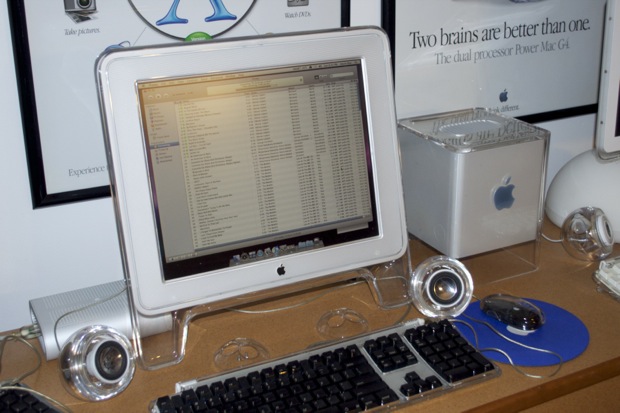
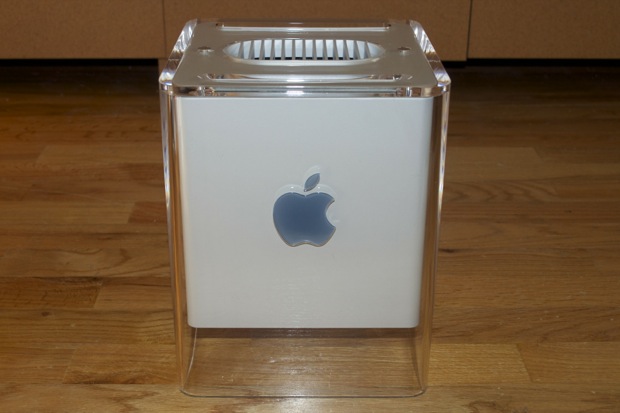
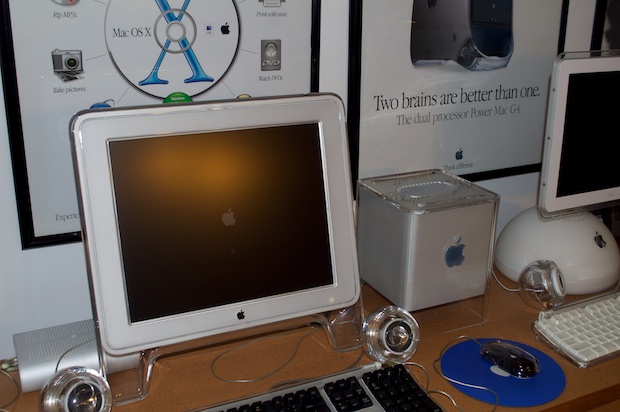
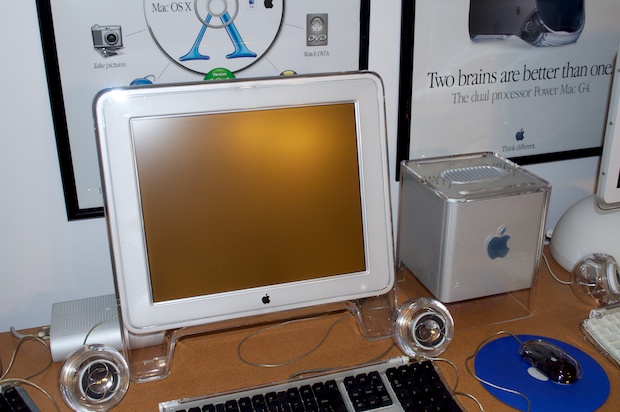
This souped-up Cube looks awesome with the 17” monitor and the better-looking enclosure. It runs like a dream, but that broken USB port is killing me! I don’t have anything needing to be plugged in (yet), but I can’t stand the thought of a broken Cube. The Power Mac G4 Cube has quickly become my favorite Mac, so I want it to be perfect!
I’m going to go ahead and swap the logic boards. Let’s do it!
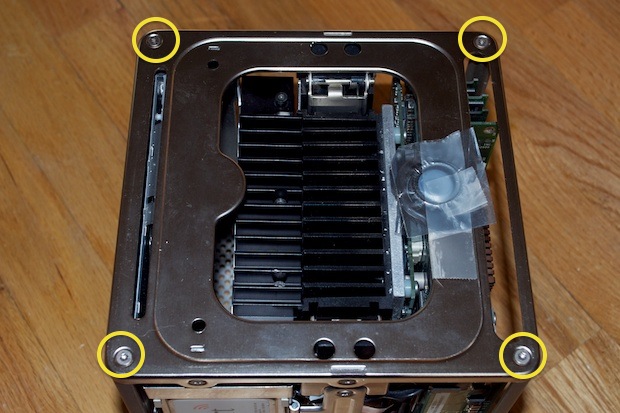
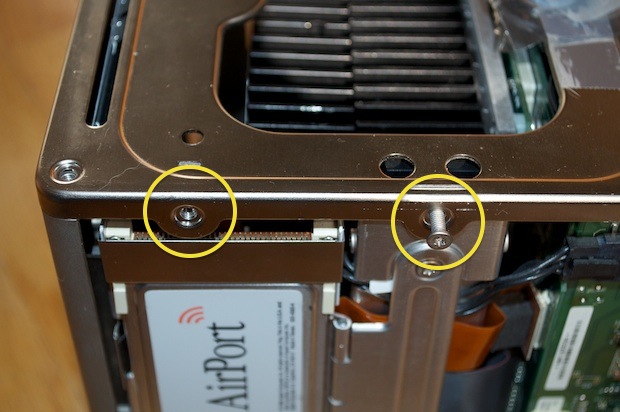
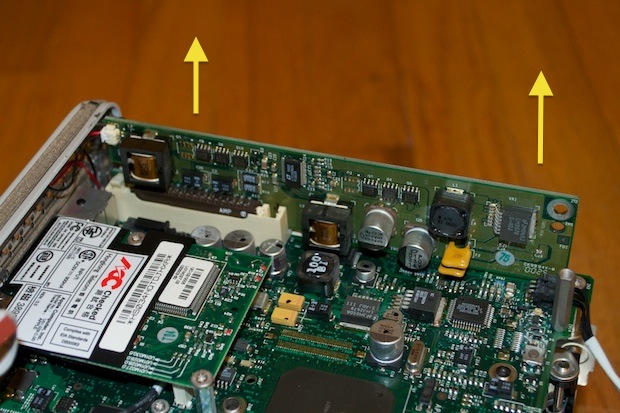
Remove the top 4 screws:
Two more screws on either side. The screw on the handle (middle) is bigger than the other one.
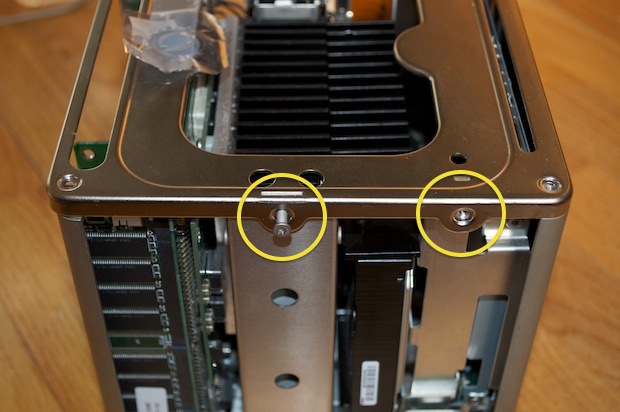
Once those 8 screws are out, gently lift off the top cover. Once the cover has been lifted, you can disconnect the power switch board.

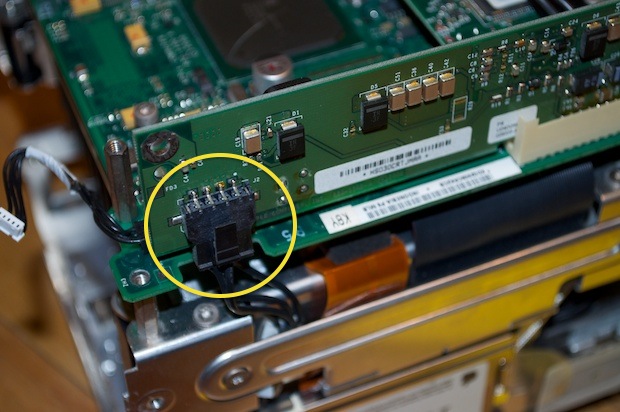
Next up is the graphics card. Remove this connector:
Remove this screw and bracket. (If you have one. Not all Cubes have one.)
Pull the riser card up out of the socket and then slide the video card out of the riser.
Disconnect these two cables and remove the video riser card.
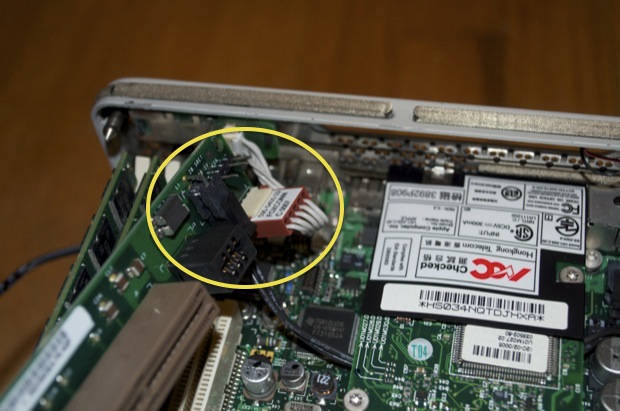
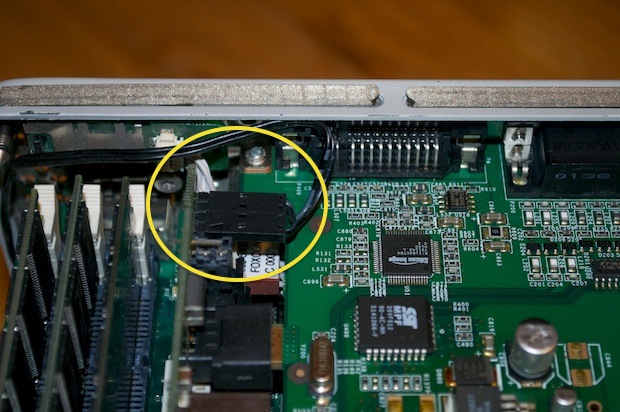
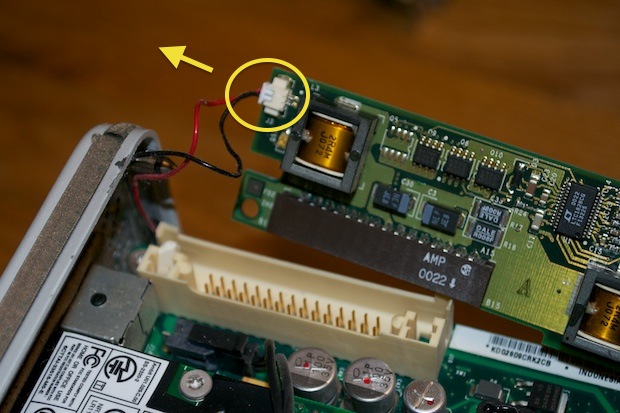
Next up is the DC-to-DC board. Remove this connector:
Locate the ejector latch and pull it towards you to unlock the board.
Pull the board straight up, but be careful of the fan wire on the left. (If one’s connected.)
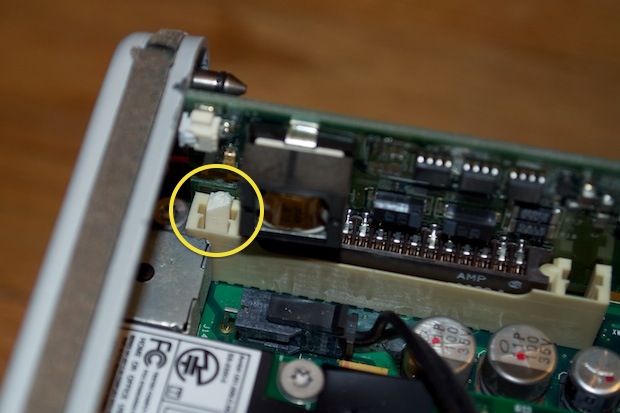
If necessary, disconnect the fan.
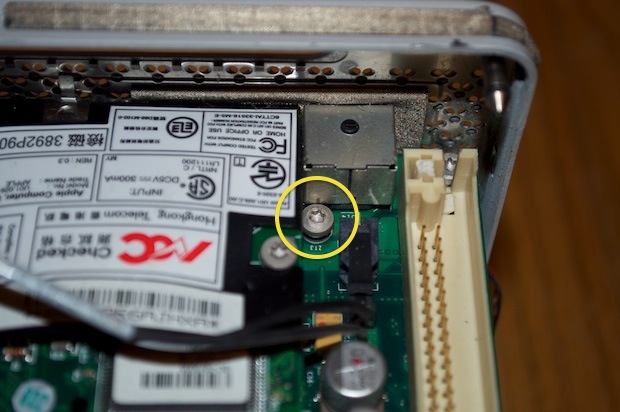
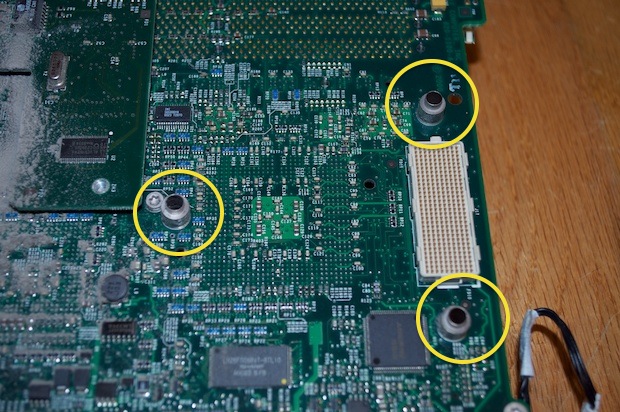
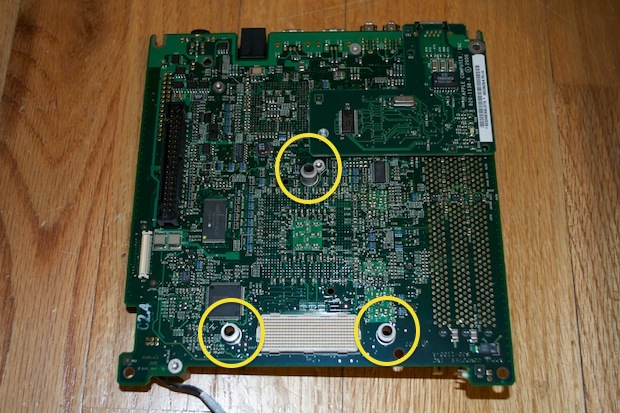
Now for the logicboard. Remove these 3 spring-loaded standoff screws:
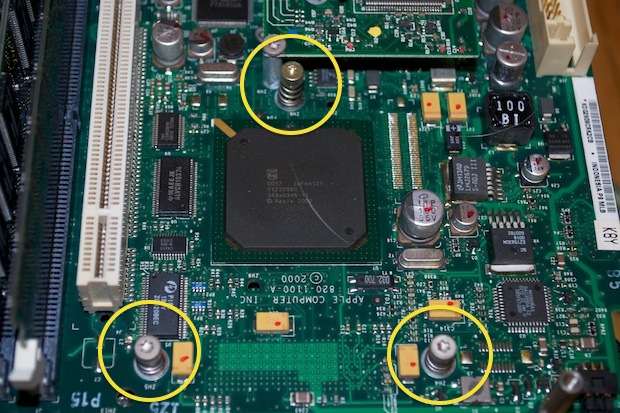
Note, the screw above the chipset in the middle is different than the other two.
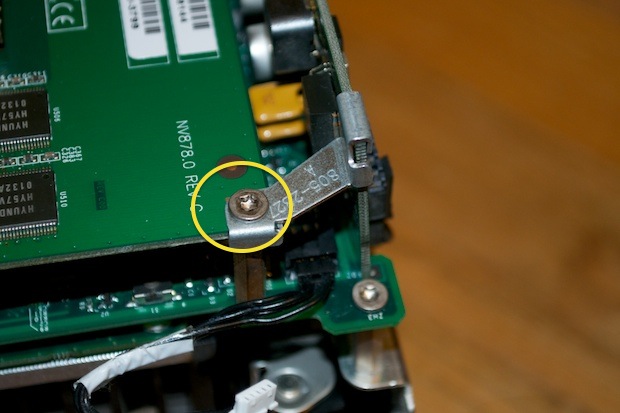
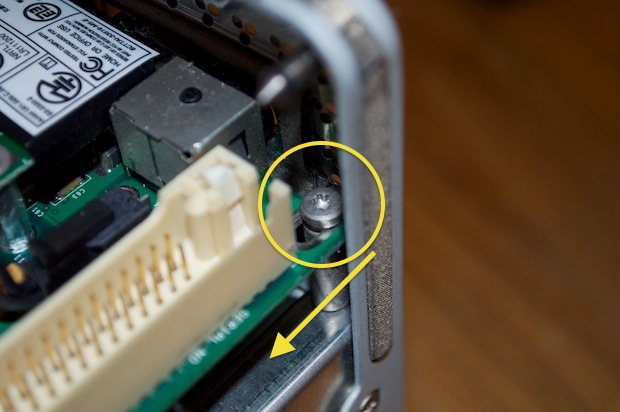
Remove this screw:

Followed by this screw:
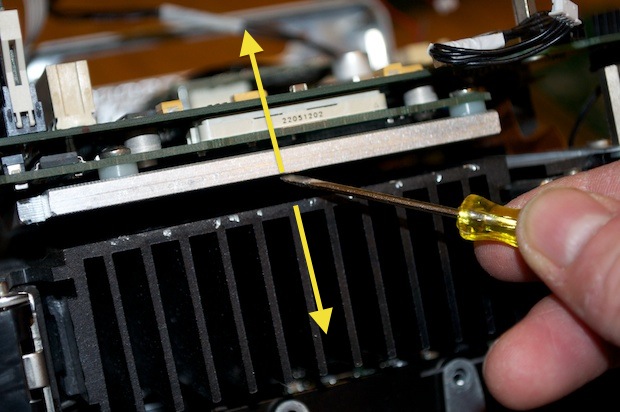
Take a flat headed screwdriver and gently pry the CPU heat spreader away from the heatsink. The thermal pads in between the two tend to act like a bonding agent.
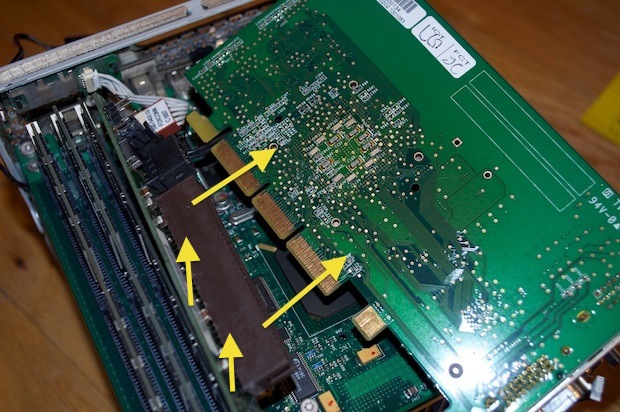
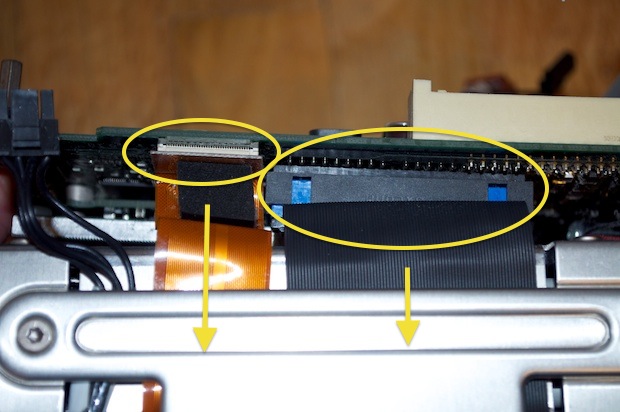
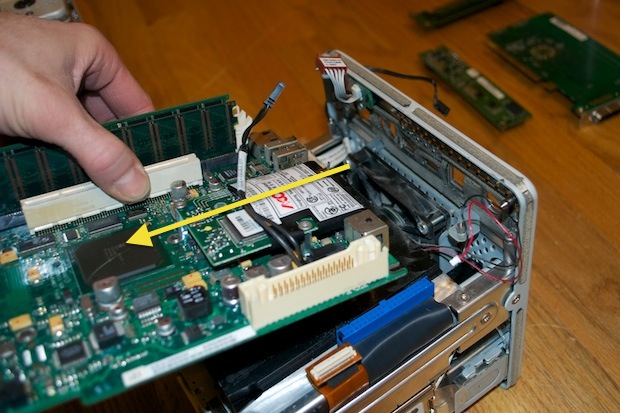
You’ll now notice there’s a pretty good deal of play in the logicboard, but it’s not free yet. Lift it slightly and disconnect these two ribbon cables:
The logicboard sits underneath these two front screw heads. You won’t need to loosen them, just pull the board out...
…and it’s free!
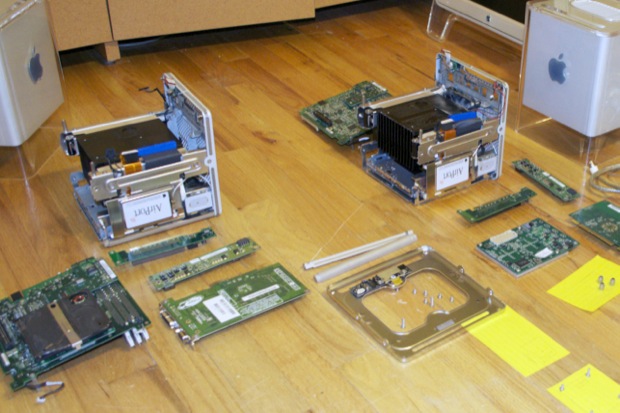
There it is. One Power Mac G4 logicboard….
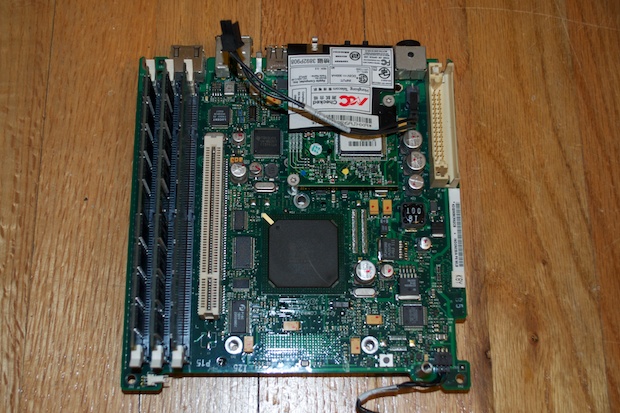
…with a PowerLogix G4 1GHz upgrade. It’s pretty dusty under there. I took it outside and blasted it off with a can of air.
Pull the processor card off at the connector, but be careful. You really don’t want to crack it.
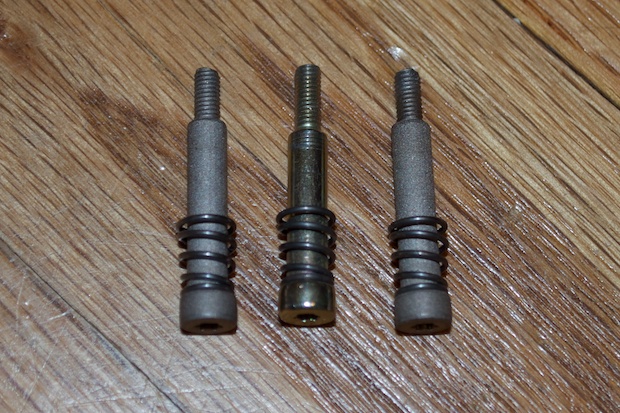
Underneath the processor card you’ll find three standoffs. Don’t lose them. They’ll fall right out if you flip the board over.
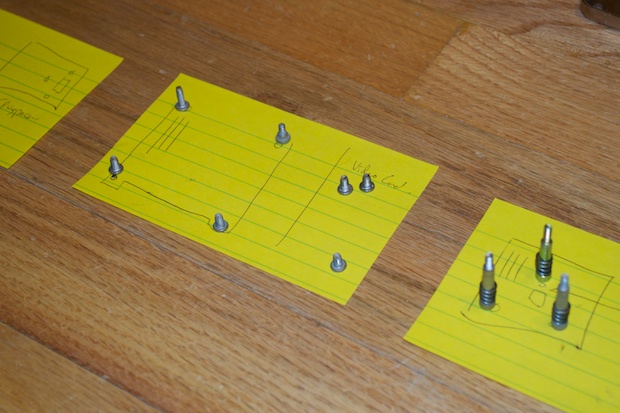
I probably should have mentioned this earlier, but since there are several different screw sizes and lengths, it’s a good idea to lay them out on paper and make some markings as to where they go.
OK, one down, one to go!
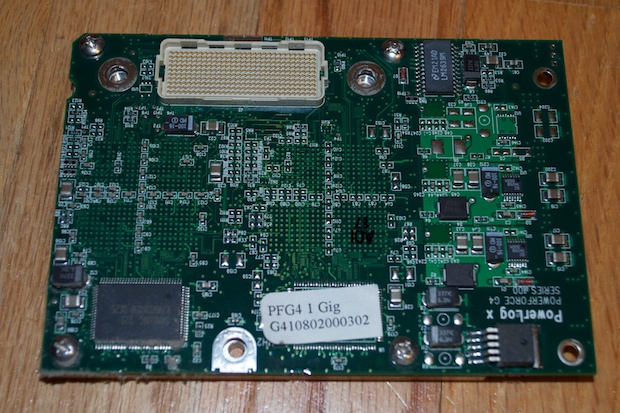
The second one is always easier! Notice the huge difference in processor card designs.
This is the stock 450MHz card. It’s almost half the size of the 1GHz PowerLogix one.
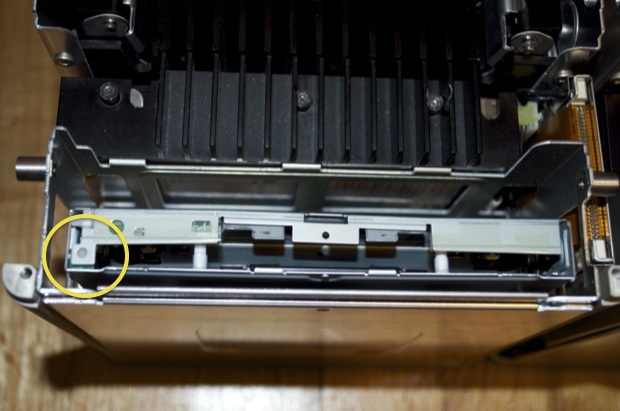
Just a few more comparisons…. Here’s the DVD SuperDrive….

…vs the DVD Combo Drive. Notice the two totally different locations for the manual eject. You can’t get to them when the machine is assembled. In the event a disc becomes stuck and you can’t eject is via the OS or starting up with the mouse clicked, you’d have to take the Cube apart to press these buttons. It would be nice if you could slide a paperclip down the slot or something, but no. Once the top plate is screwed on, it’s inaccessible. Design oversight?
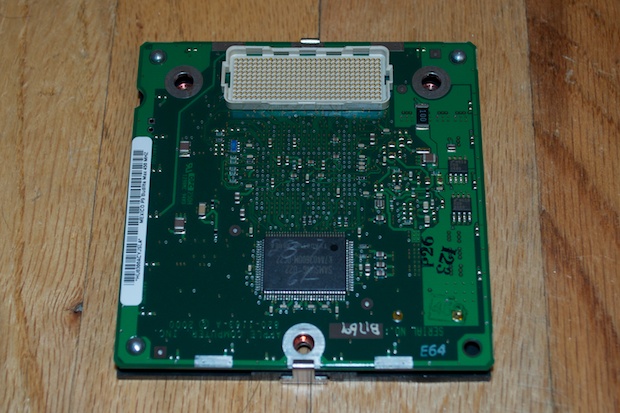
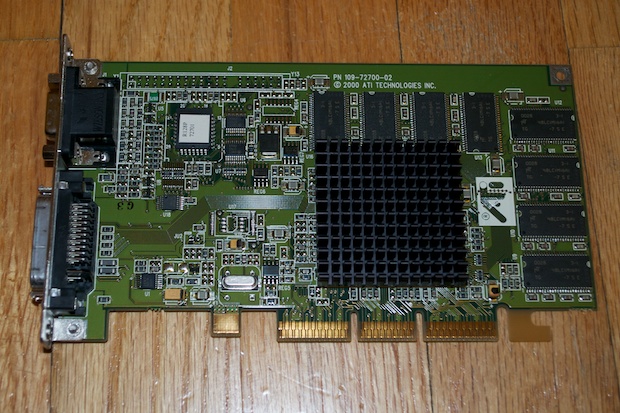
Here’s the Nvidia GeForce 2MX card that was available as a build-to-order option. It sports 32MB of RAM, double that of the stock ATI Rage 128 Pro.
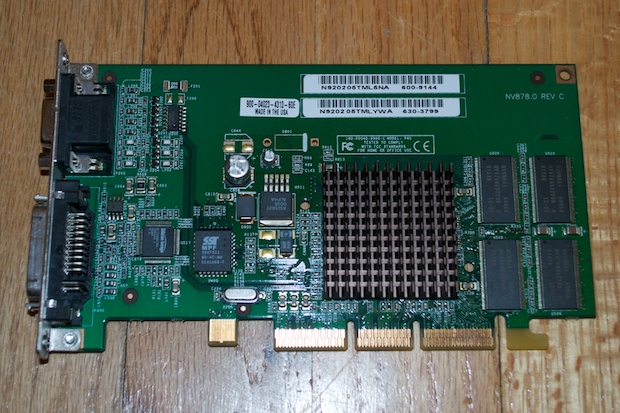
ATI Rage 128 Pro. Not bad, but don’t get your hopes up on connecting a 23” Cinema Display.
Wow, that was quite the teardown!
OK, moving right along... Swap logic boards and put it back together. Make sure the processor standoffs are nice and straight.
Clip the processor card on; maybe add a little thermal paste if you feel the need…
…and put it all back together.
Connect it all back up and power it on.
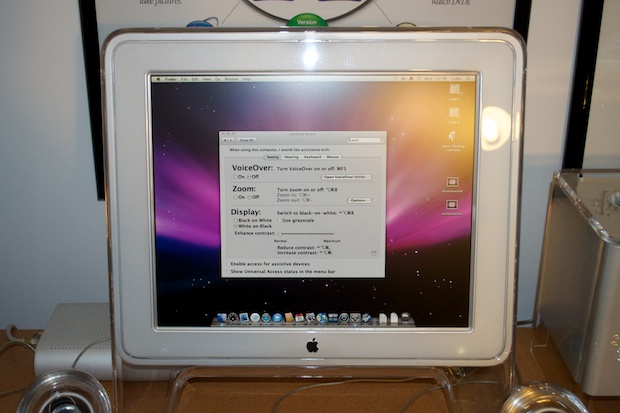
Wait a minute…that display looks kind of dark.
What happened to the gray? Did I lose the backlight?
Woah? Yellow? What’s going on? Did I bend a pin or something? Where’s my blue splash screen?
Urgh! Inverted Colors? Date set to 1969? What gives?
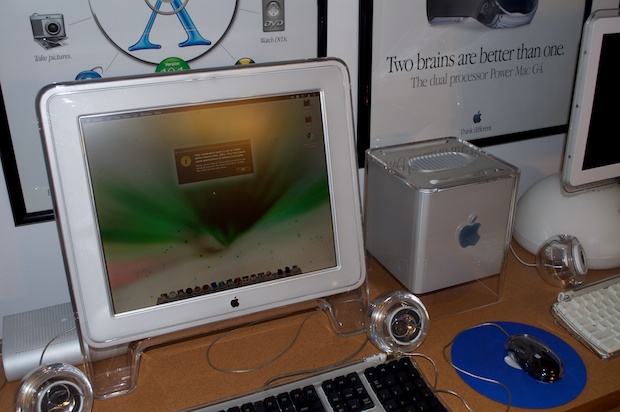
Ah yes, I’ve seen this before. It’s a “Universal Access” option. Not many people know about it, especially the “noobs”. I saw it posted on a site years and years ago about doing it to a friend’s computer as a prank. For people who don’t know about it, it’s a good way to freak them out.
I had to invert the image in Pixelmator to illustrate the effect. If you take a screen shot via cmd+shift+3, it’ll actually capture the image un-inverted.
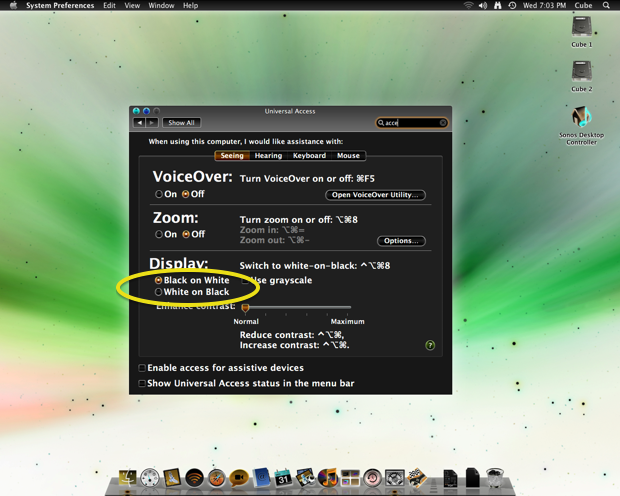
Under “Universal Access”, just make sure “Display” is set to “White on Black”. Why it flipped to “Black on White” is a mystery.
As far as the clock jumping back to 1969, that’s because I disconnected the logicboard from the PRAM battery. The Cube is in tip-top shape. Sweet enclosure, jacked up processor, maxed out RAM, sweet video card, and a DVD burner. Boom!
But there’s a problem. I loaded iTunes with a ton of music and I was converting them all from AIFF to mp3 when it just shut off. Not a graceful shutdown. It’s like someone pulled the plug out of the wall. I restarted it back up and it did the inverted color / 1969 date thing again. I fixed the color and date and fired iTunes back up. About an hour into things, it did it again.
Houston, we have a problem.
I looked online for a solution. Some users have reported that a faulty power switch on the monitor sometimes mistakenly registers a touch, and it shuts down the Cube. This is not a shutdown. It’s a shut-off. In any case, I jumped into System Preferences and disabled the button on the monitor. Back into iTunes, I gave it another go. Still no luck.
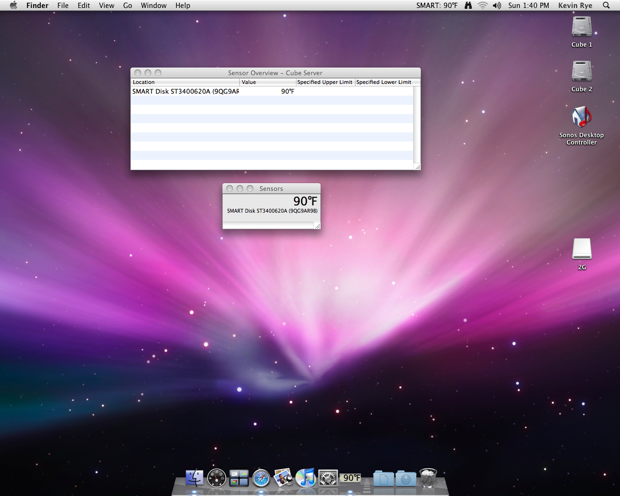
Is it overheating? Is this sudden loss of power due to overheating? I stuck an ear over the grill and could hear the fan spinning. The air coming out of the Cube is warm, not hot enough to indicate that anything is going critical-mass. I downloaded Thermograph and fired it up. Since there are no internal temperature sensors on the Cube, I can’t monitor the CPU temperature. All I can monitor is the temperature on the hard drive. At minimum, it might give me a good overall indication of just how hot it is inside the enclosure.
I fired up iTunes and set it to re-encode just about 200 songs. The hard drive temperature slowly crept up to 95°F before the Cube shut off again. That’s odd. I wouldn’t think 95°F would be hot enough for a failure. I’ve seen hard drives get a lot hotter than that. Besides, this is a Seagate drive. They run pretty hot to begin with. Well, if the hard drive is 95°F, maybe the CPU is way hotter than that. I searched online and some users have seen their processors hit well over 120°F. Again, judging by the air dissipating from the top of the Cube, I wouldn’t say it was overheating.
I decided to crack the Cube open one more time just make sure all the connections were tight. Lo and behold, the VRM (DC-to-DC board) wasn’t properly seated. That explains that! After a slight adjustment and a reboot I ran iTunes through its paces once more. It happily re-encoded 200 songs without incident. The machine ran solid and there were no more rapid shutdowns. Some time later, I shut the machine down and hopped on my Mac Pro. About 5 minutes later, the Cube just turned on by itself. “Bong!”.
What? I turned around to see the Cube booting into OS X. What now?
I shut it down again. About 10 minutes later, “Bong!”. Err! By now it was close to midnight and I had not the time nor the patience. I killed the power at the power strip and called it a night.
When I got home from work the next day, I did a little research. Many users experience, over time, a certain amount of degradation of the rubber gasket that surrounds the proximity sensor of the power button. This rubber gasket is located on the enclosure, not on the button itself.
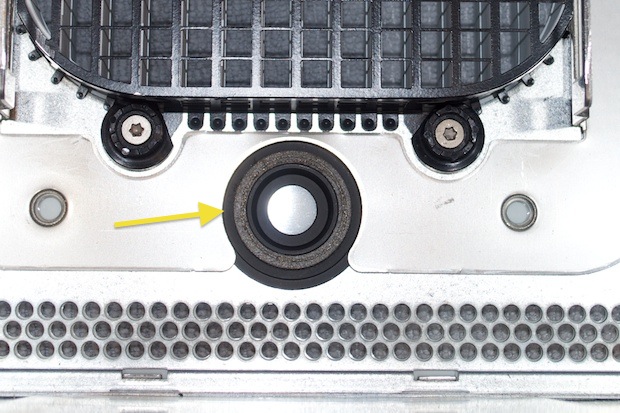
The fact that Apple chose to add it to the service manual hints at the fact that there is a need to periodically replace it. Although, they don’t offer any reason as to why you’d ever need to replace it.

A simple trick that I learned that’s pretty common among the Cube graybeards, it that you can remedy false starts and shutdowns by the simple application of a small piece of antistatic bag. That’s pretty funny…. because when I first opened the Cube, I noticed a piece of antistatic bag taped over the LED.
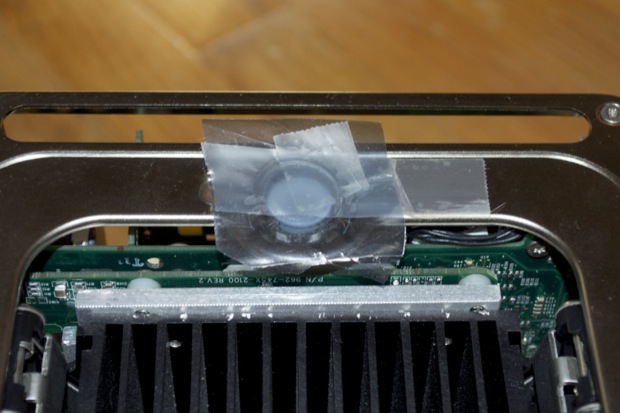
I though the previous owner did that to dim the LED. So I removed it.
I cut a new piece and closed the Cube up, again. I reconnected everything and pressed the button. Nothing. Is it too thick? I opened it up, cut a little hole in the center, rinsed and repeated.
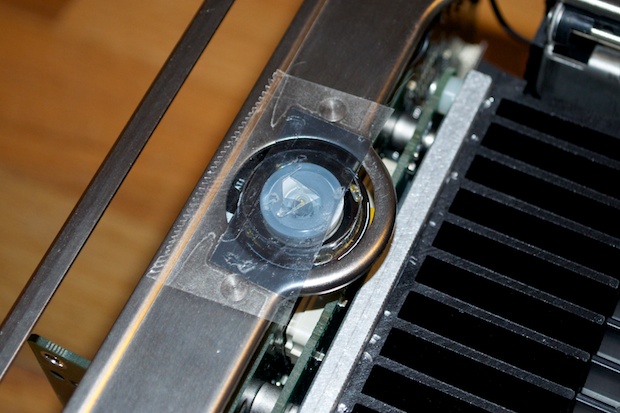
The Cube powered up. It stayed powered on for several hours until I shut it down. It has since stayed off and hasn’t turned on by itself. It looks like I’ve successfully ironed out all the kinks.
Say hello to my new favorite Mac!