eBay was good to me again. I snagged a 2 Gig 2nd generation Nano for $29 because it was “damaged and may or may not work”. A rather cryptic description, I admit. They also used a stock photo so I really didn’t know what was wrong with it. At $29, it was worth a shot.
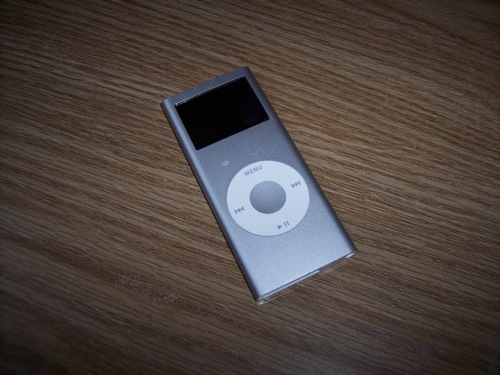
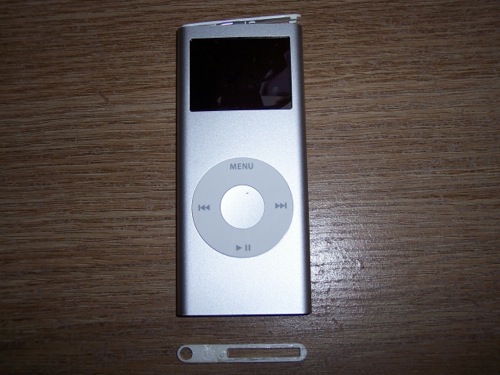
I just got it in the mail today. After a quick look over, it was apparent that “damaged” meant a smashed LCD. I am, however, hopeful that I will be able to fix it. The housing looks pretty new. With the exception of the smashed screen, this iPod appears to have been well taken care of. So far, it appears that the iPod is otherwise perfect.
At first it wouldn’t turn on. I assumed the battery was dead. I plugged it in using my wall charger and connected a pair of headphones. After a few seconds the screen lit up. I can’t see anything on the screen since it’s smashed, so I just pressed select a few times until I eventually heard music out of the head phones. Great, it works! I let it charge for a couple of hours, but it still won’t turn on unless it’s plugged in. I take it that the battery is toast too.
I then connected it to my Mac. iTunes picked it up right away. I was able to restore it and I threw on a bunch of tracks. It looks like all I have to do is replace the LCD and the battery and I’ll have myself a brand new iPod Nano!
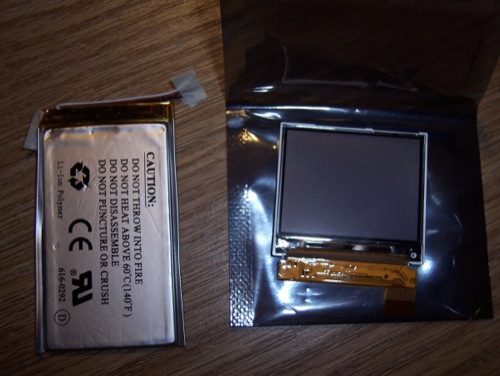
I picked up a new LCD for $8.33 and a battery for $4.80 via eBay. I ordered them Wed and they were here Friday. Very fast! The guy was only 1 state line away so they got here just in time for the weekend. Awesome. All together, that brings the price to $42.13. What a deal!
I documented the repair as a sort of a “how to” instead of my usual “workflow”. Here’s
At first I thought all those little marks were scratches, but they are not. A quick cleaning with a damp cloth removed them all. Even the one at 11 o’clock (from the clickwheel).
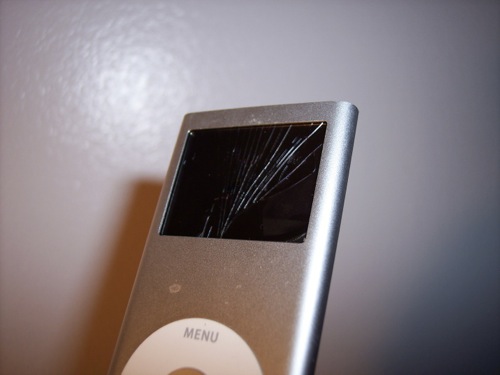
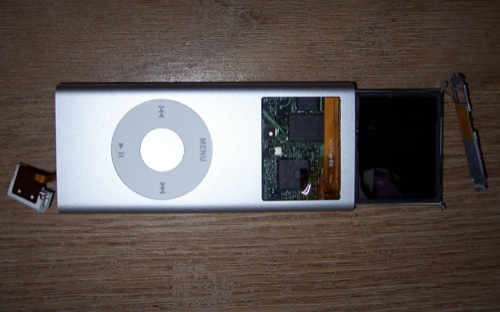
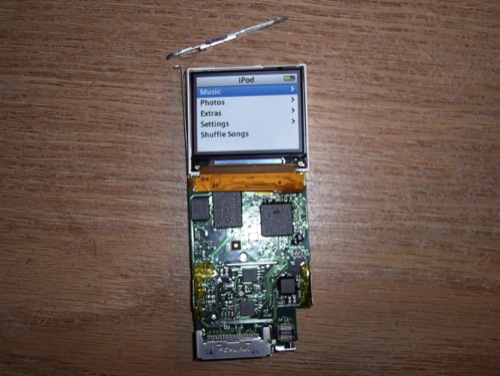
See, the LCD is totally smashed. Nothing is visible upon power up but a faint backlight. So, a broken LCD and a bad battery, but otherwise fully functional.
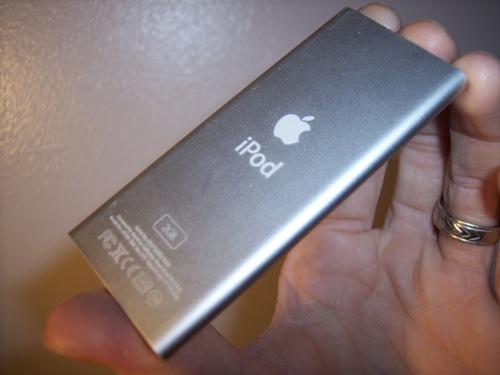
Oh, did I mention that apple.com/support reports that it still has another 9 months of AppleCare left? Hum, I wonder if (cough) opening (cough) it to replace the LCD and battery voids the warranty?
OK, let’s replace that screen and battery.
New Battery? check
New LCD? check
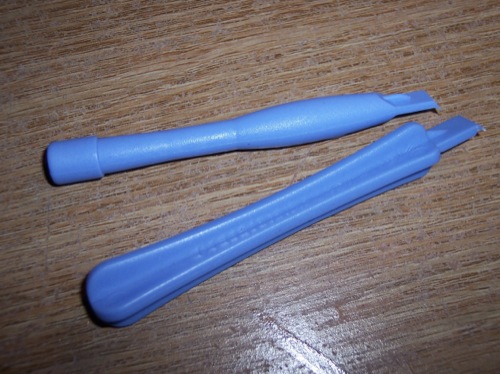
Both the battery and the LCD came with iPod case opening tools. They are a must if you’re looking to open an iPod without destroying the finish.
Step 1:
Using the plastic tools (aka spluger), remove the top and bottom plastic caps. Then, remove the 2 visible screws from each end.
Keep an eye on what screws came from what hole, they are not all interchangeable.
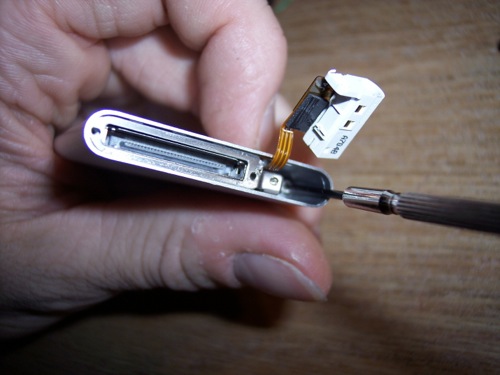
Step 2:
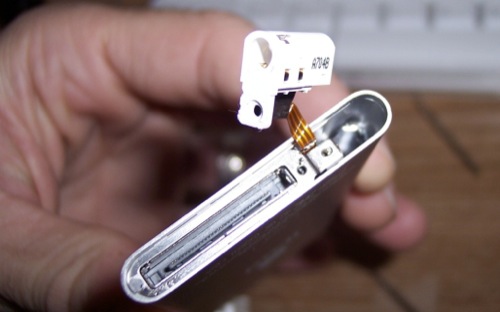
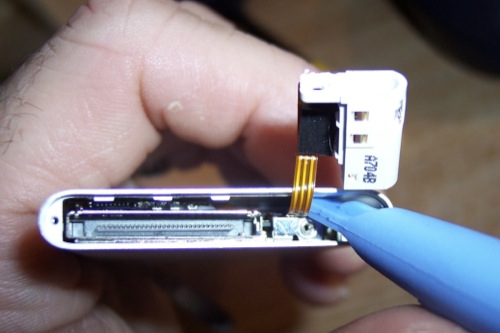
Pull out the headphone jack, remove the remaining screw underneath that secures the dock connector bracket, and disconnect the clickwheel from the logicboard.
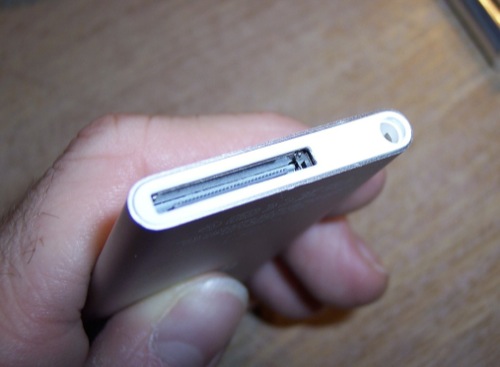
Step 3:
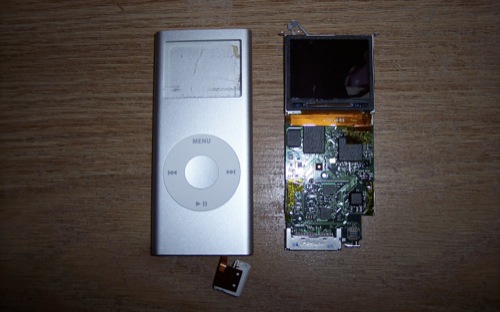
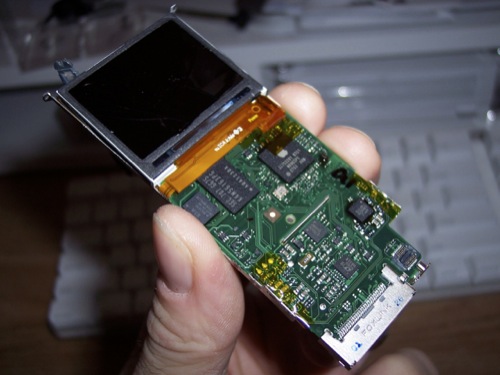
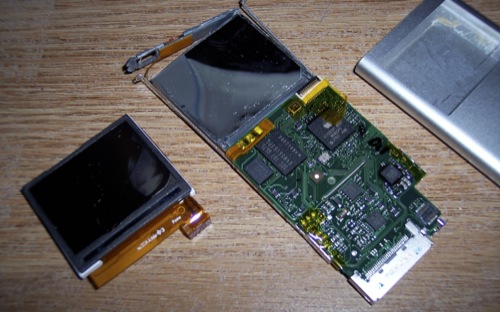
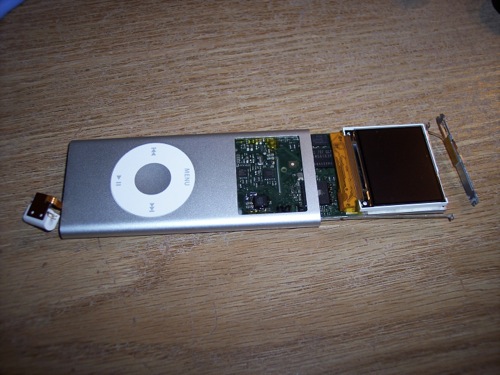
Slide the logicboard assembly out of the aluminum housing by pushing up from the bottom.
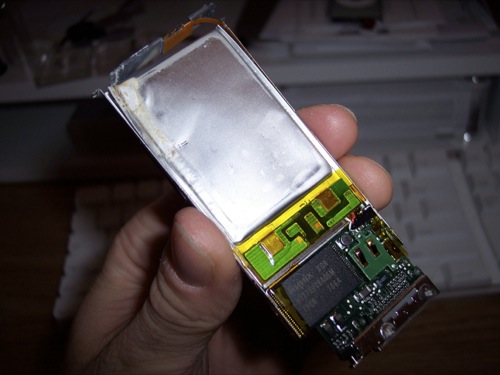
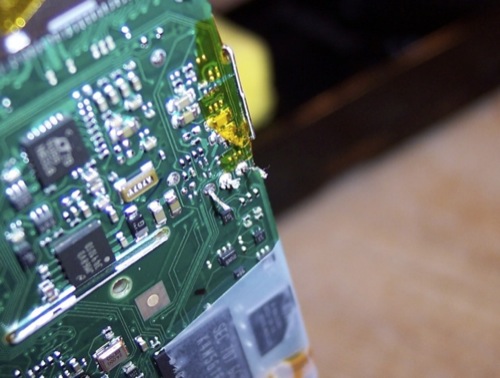
If you look at the top-left side of the battery, you’ll see what looks like corrosion. There is also some on the inside of the case where that spot on the battery touches the
case. Maybe that’s why it only powers up when connected to the computer or the charger. I guess whatever force cracked the screen also cracked the battery.
Step 4:
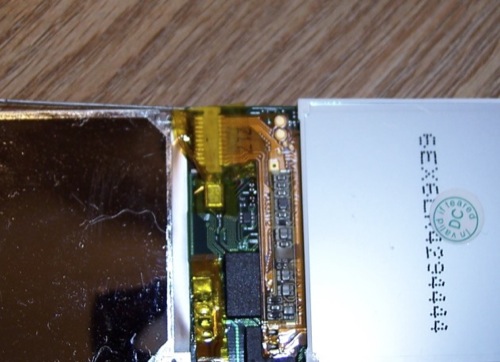
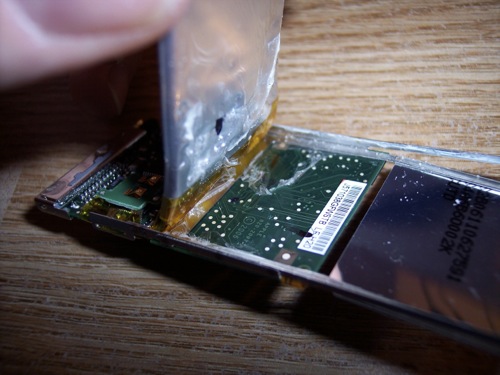
Disconnect the LCD by removing the little piece of orange tape that covers the LCD connector, flip up the little latch on the connector and pull out the old LCD.
Step 5:
Connect the new LCD, flip down the latch to lock it in, and cover the connector with the tape that was previously removed.
Step 6:
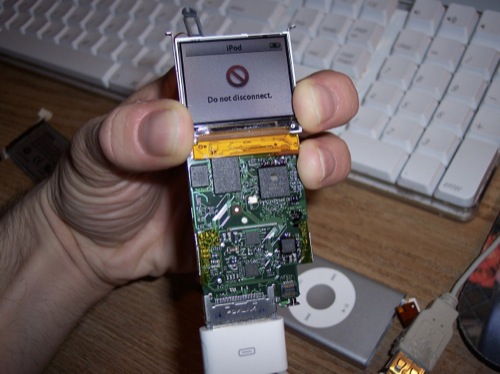
Power it on and verify that the LCD works. Awesome.
Now for the battery...
By the way, I figured it’s probably safer to replace the battery before the LCD, since the constant handing could damage the LCD. For now, I removed the LCD.
Step 7:
A portion of the battery is glued to the logicboard. Using the plastic tool, gently pry off the battery. Be careful not to gouge the board or tear off one of the three (black, red, and white) soldered battery wires.
Step 8:
On the top of the logicboard, the three battery connections are protected by a blob of black rubber cement. Scrape that away being careful not to destroy your iPod.
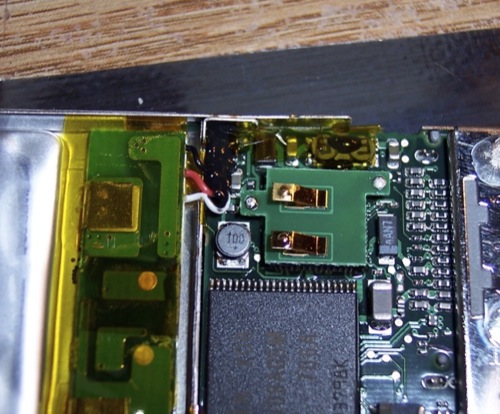
Step 9:
Locate the three battery contacts on the top side of the logicboard. Remove the orange tape that covers them.
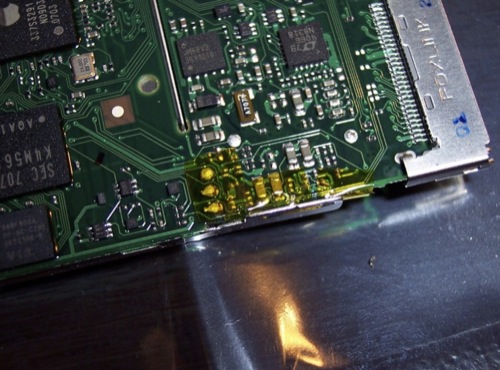
Step 10:
Unsolder the three connections. Try to open up the three holes without melting the board. As you can see in mine, the holes are still filled with solder.
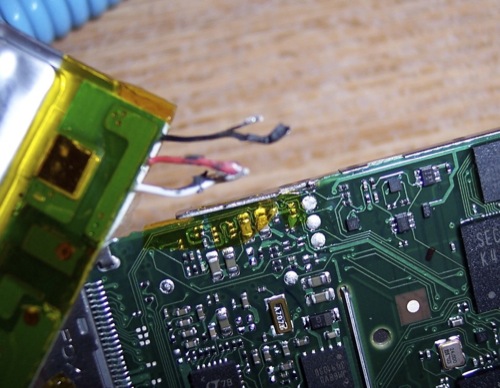
Step 11:
From the back, push the black, red, and white wires from the new battery through the holes and solder. (Black is the one closest to the edge, red is in the middle, and white is in the last hole.) When complete, trim the ends and cover back up with the orange tape.
Step 12:
When you are finished, try to secure the wires underneath the battery so that they don’t get hung up or torn out when you slide the whole thing back into the housing.

Step 13:
Test that the battery works by toggling the hold switch. Awesome!
Step 14:
Slide the logicboard assembly back into the case. Be careful not to scratch the LCD. Also make sure those battery wires don’t get hung up on anything.
Step 15:
Pop the clickwheel connector back onto the logicboard.
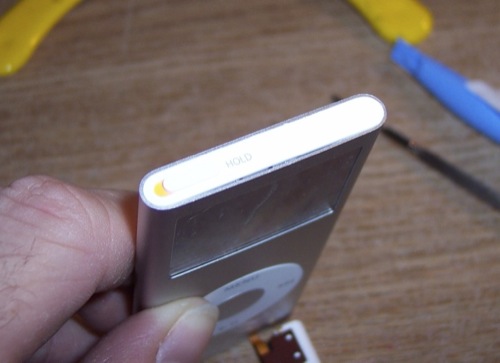
Step 16:
Screw the Hold switch bracket back on.

Step 17:
Pop the top cap back on. It should still be pretty sticky.
Exercise the Hold switch and make sure that it works.
Step 18:
Screw the dock connector bracket back in.
Step 19:
Screw the headphone jack back in.

Step 20:
Pop the cap back on. Again, it should still be pretty sticky.
Step 21:
The last test, power up, sync, and play some tunes!
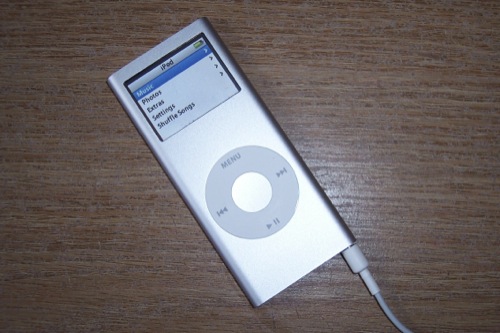
I just saved over $100. That’s awesome. There’s nothing more satisfying than fixing something that someone got rid of because it was broken.
Now, all I need is a case...