Over the past few years I’ve made several attempts to connect my SE to the internet. I never had much luck, and needless to say, I never figured it out. Something that seemed relatively straightforward just didn’t work. There’s no shortage of documentation online and there’s a ton of posts over at 68kmla.org to prove that more than a handful of people figured it out. I’ve tried installing drivers, MacTCP, and Ethernet extensions, but nothing seems to “do anything”. I must be missing something.
Since I just got my
Power Mac 5200 on the internet and file sharing via FTP with my Mac Pro, I figured I’d give my SE another shot. Networking on OS 8.6 seems to just work right out of the box. All I had to do was enable TCP/IP and set it to DHCP. Done. It was then just a matter of installing an FTP client and I was off to the races. I was hoping now with a little more insight into classic networking that what I though was challenging on the SE a year ago, would be that much more intuitive today.
I know it’s not a case of a faulty nic, because the Asante driver for my SE won’t run if a card is not installed. I’ve tried it. That leads me to believe that if the card is detected by the installer, then it’s not dead.
It’s software.
I recently found an SE-compatible version of Fetch. Since Fetch seemed to do the trick on my 5200, I figured that I’d try taking the FTP route on the SE. I’m not looking to browse the Internet on it, I just want to be able to move files back and forth. A lot of the confusion I found in the past following some of the instructions online stemmed from people trying to get a browser installed. I guess that takes a little more work, more software, and more tweaking to get everything to play nice. Again, FTP seemed the way to go. The easier way to go.
So with Fetch in hand, I set out once again get the SE on the Internet.
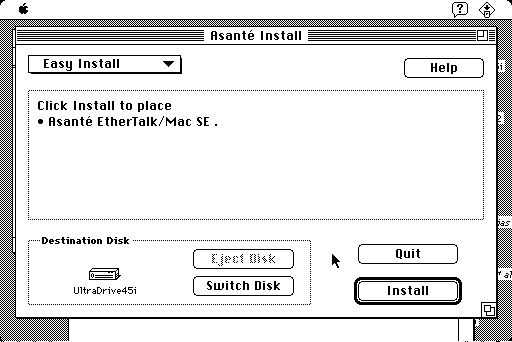
First thing, install the Asante nic driver.
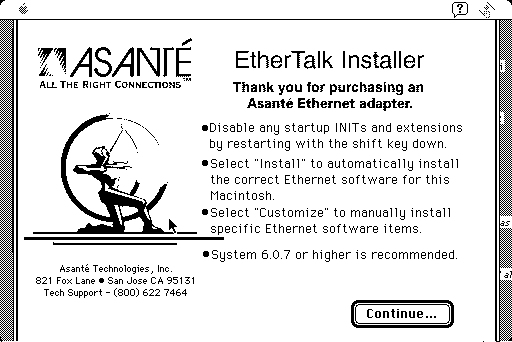
I ran it with the default options. Installation was a success.
After that, I downloaded MacTCP 2.0.6 and dropped it in my System Folder. I then gave the machine a reboot. Once it was back up, I launched MacTCP again from the Control Panel.
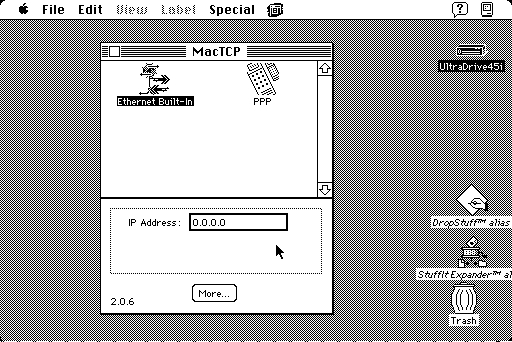
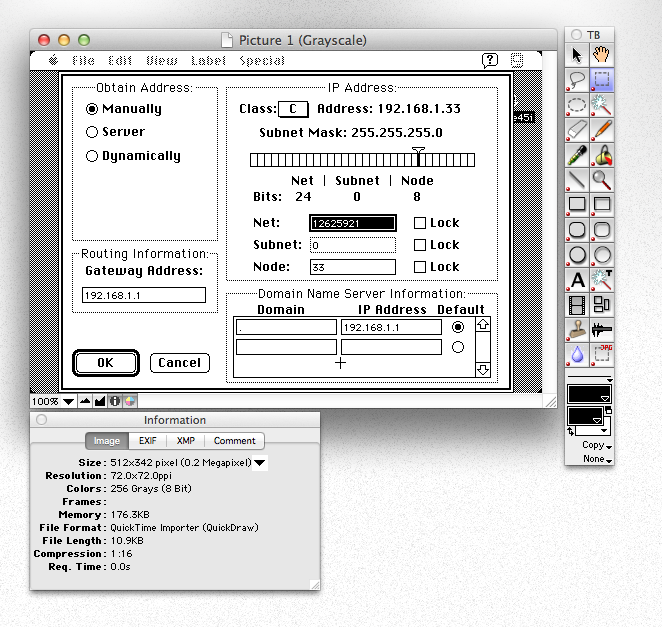
With the Asante driver successfully installed, a new Ethernet option was now available in the MacTCP pane. I selected it and pressed the More button. That opened the TCP/IP configuration dialog.
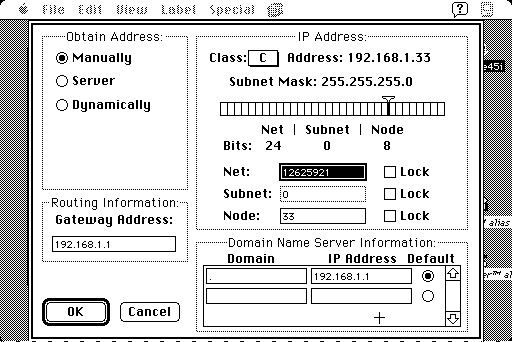
I set the “Obtain Address” field to Manual and then filled in my gateway address. The default IP Class is C. That’s the correct option, so I left that alone. For DNS, I set the domain to “.” and entered the same IP address as my gateway. That might have been one of the major faults I had in the past. Nowhere did I ever see anyone mention that the name had to be a period. I always called it “Home” or “local” or guessed at what I thought it should be. Based on some new documentation I found, you just have to type a period for the domain name. So I guess that’s what it needs to be.
I pressed OK and the dialog closed. I was now able to set an IP address on the main window. I entered an address that wouldn’t conflict with the million other devices on my network and closed MacTCP.

MacTCP didn’t complain that my IP address was incorrect, which it had done in the past. So I think I might have gotten it right. I gave the machine a reboot and reopened MacTCP. My IP address stuck. That’s definitely a good sign.
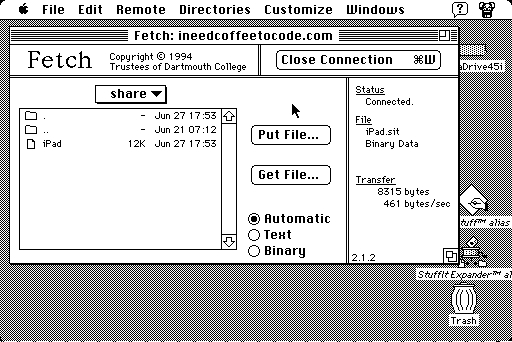
I installed Fetch 2.1.2 and ran it. Once it opened, I was prompted to make a connection.
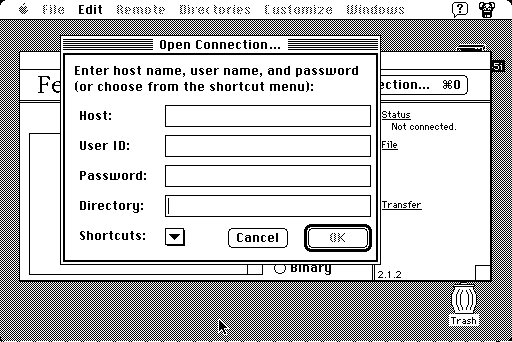
I entered my credentials and pressed OK. Eureka! We have a connection! The share directory on my website was displayed. It works!
Back on my Mac Pro, I grabbed an image as a test. The first thing that popped into mind was an iPad. So I grabbed an image off Apple’s website.
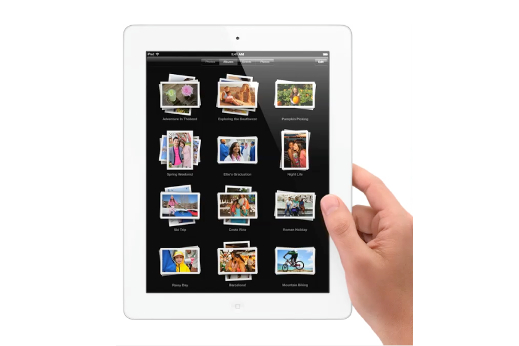
I then dropped it into GraphicConverter and exported it as a MacPaint file.
Then using Cyberduck, I uploaded the file to my website.
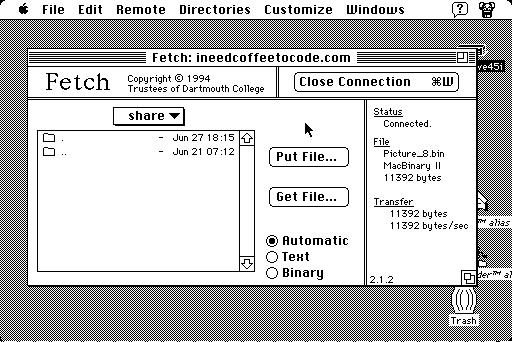
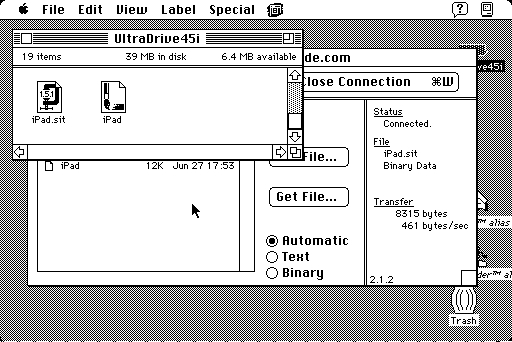
Back over on the SE, I refreshed the window. There it is! Yeah!
I selected Get File and was prompted to save it.
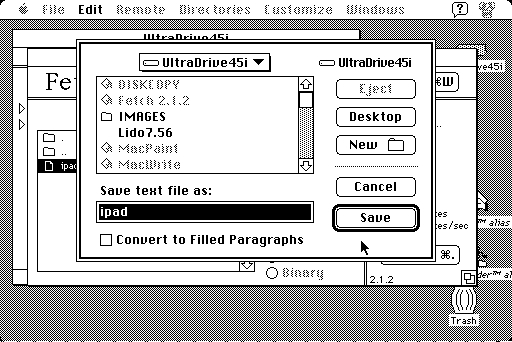
After pressing Save, the download completed, but the file won’t open properly. It appeared as a text file that MacWrite opened. The contents were just garbled text. What gives?

I tried downloading it again. Instead of choosing Automatic, I chose Binary, which automatically specified the file as a Stuffit archive.
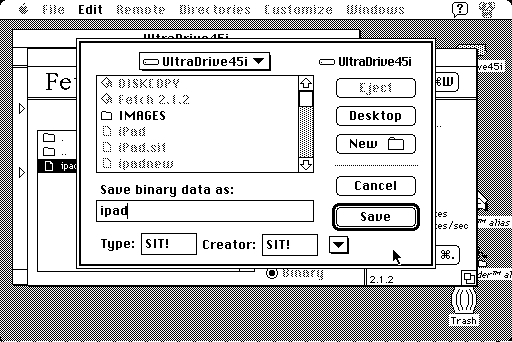
Still, no luck. Stuffit complained that the archive was corrupt. Somehow the file is getting chewed up. I tried a few other file types, but they all ended up “ corrupted”. Something was not right.
I wondered if the files on the Mac Pro side were being uploaded as Binaries or as ASCII. I checked all the settings in Cyberduck, but there seemed to be no way to specify it. I went back into mini vMac and stuffed the iPad image as a binary using Stuffit. I then FTP’d the file back up to my website.
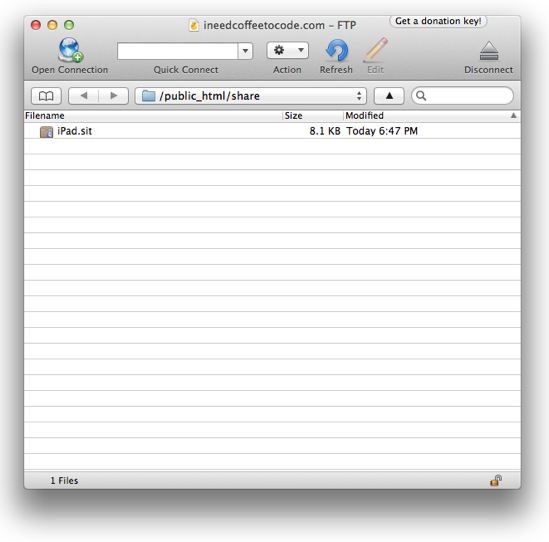
I refreshed Fetch and downloaded the .sit file. Again, specifying Binary.
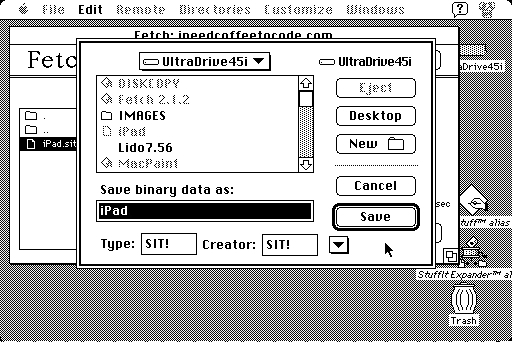
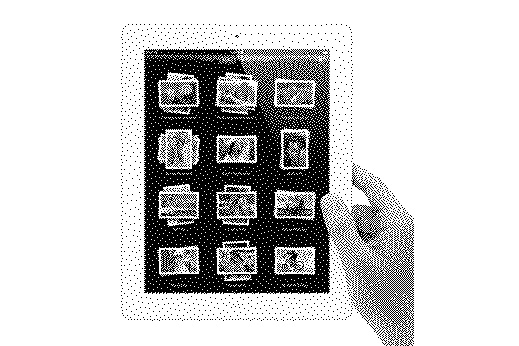
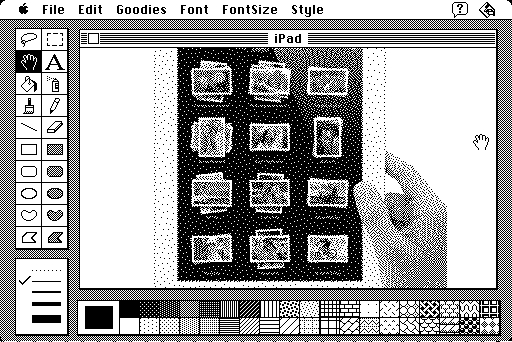
Stuffit happily unstuffed the .sit file. The extracted file had a MacPaint icon, so it looked like a good sign.
I launched the file, and MacPaint didn’t hesitate in opening it. We have liftoff.
So it works, with a little tweaking. Strange the little hacks that you have to do to get everything to play nice. It looks like prepping the file in mini vMac wasn’t a waste of time after all.
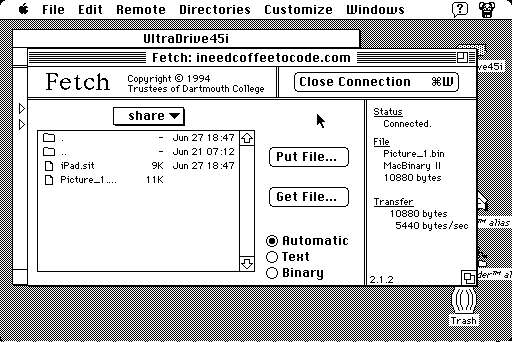
Now to go the other way. Can I upload files too? Back in Fetch, I chose Put File and selected one of the screen shots I’d been taking. I was prompted to rename the file, if needed. I chose to send the file as a binary, figuring it too would get corrupted if I selected Automatic.

I pressed OK, and off it went. The file now appeared in the directory. This looks promising.
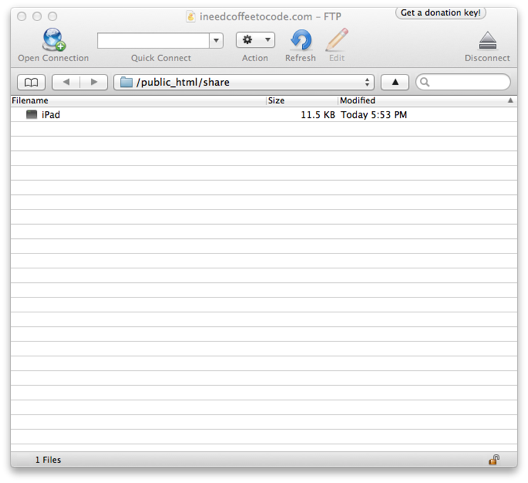
Back on the Mac Pro, I refreshed Cyberduck and was happy to see my file. I dragged the binary to my desktop and opened it. It extracted without a problem.
I was then able to open the image with GraphicConverter and save it as a .jpg.
This is awesome. I can now, just like my Power Mac 5200, send files to and from my Mac SE via FTP. No more sneaker net!
Next challenge? Getting the Color Classic online, and maybe try to get my Mac Plus in on the fun too.